Authorize.net is a trusted and secure payment gateway widely used to process online transactions. Tripcart has integrated with Authorize.net, enabling users to book trips conveniently and securely.
To set up Authorize.net on Tripcart, you’ll need three essential credentials: a Login ID, a Transaction Key, and a Public Client Key. These details are required to authenticate the connection and ensure smooth payment processing.
Follow the steps below to configure Authorize.net and complete the integration process.
Steps to Configure Authorize.net #
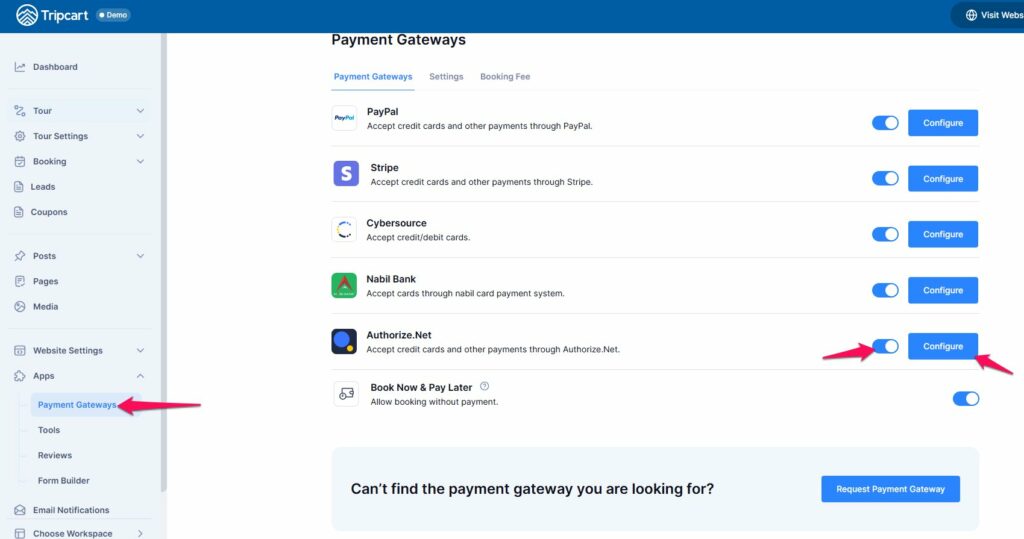
- Go to the Dashboard > Apps.
- Select Payment Gateways from the available options.
- Find the Authorize.net payment gateway in the list.
- Toggle the switch to enable the Authorize.net payment gateway. Once enabled, the Authorize.net option will appear on the checkout page.
- Click on the Configure button to proceed.
Configure Authorize.net Payment: #
- Payment Label: Add a label for the payment gateway. This label will appear on the checkout page.
- Login ID: Enter the Login ID for your Authorize.net account. You will receive this via email after purchasing a plan and creating an account in Authorize.net. You can sign up here: https://www.authorize.net/sign-up/pricing.html
- Transaction Key: Enter the Transaction Key for your account. This key will also be sent to you via email after you sign up for an Authorize.net account.
- Public Client Key: Enter the Public Client Key for your account. You can obtain the Public Client Key after creating an account. For instructions on managing your Public Client Key, visit: Manage Public Client Key.
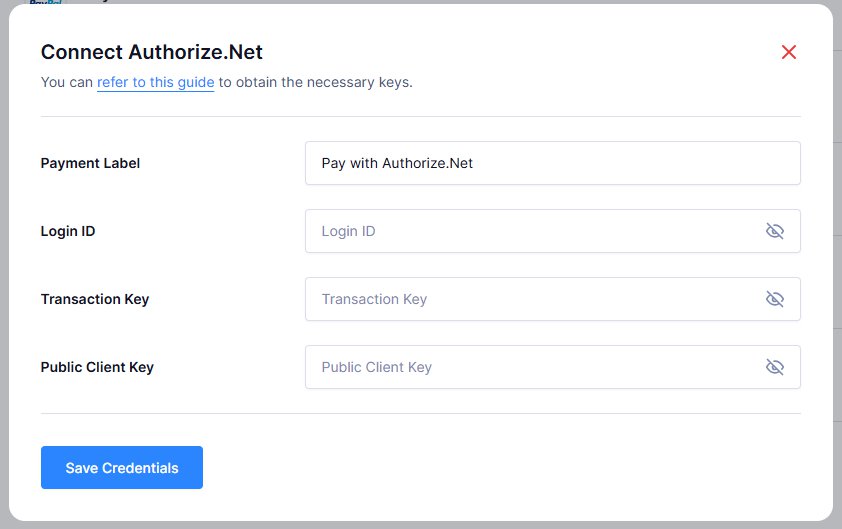
- Once all fields are filled in, click the Save Credentials button to save your settings.
By following these steps, you will have successfully configured the Authorize.net payment gateway for Tripcart, allowing users to book their trips using Authorize.net.