The Reviews feature in Tripcart allows you to enhance your tours by displaying reviews from multiple trusted platforms like Tripadvisor, Google Reviews, and Trustpilot. These reviews are dynamically pulled using RapidAPI and displayed on the Trip Detail Page to give customers a comprehensive overview of your tour’s reputation.
Below is a step-by-step guide on how to configure the Reviews feature in Tripcart for each platform:
Setting Up RapidAPI #
Before you can pull reviews from external platforms, you’ll need to set up RapidAPI. This involves generating an API key, which you will link to Tripcart.
Sign Up or Log In to RapidAPI #
- Visit RapidAPI and create an account (if you don’t have one already).
- After logging in, go to the Developer Dashboard. Here is the link to the Developer Dashboard page – https://rapidapi.com/developer/dashboard
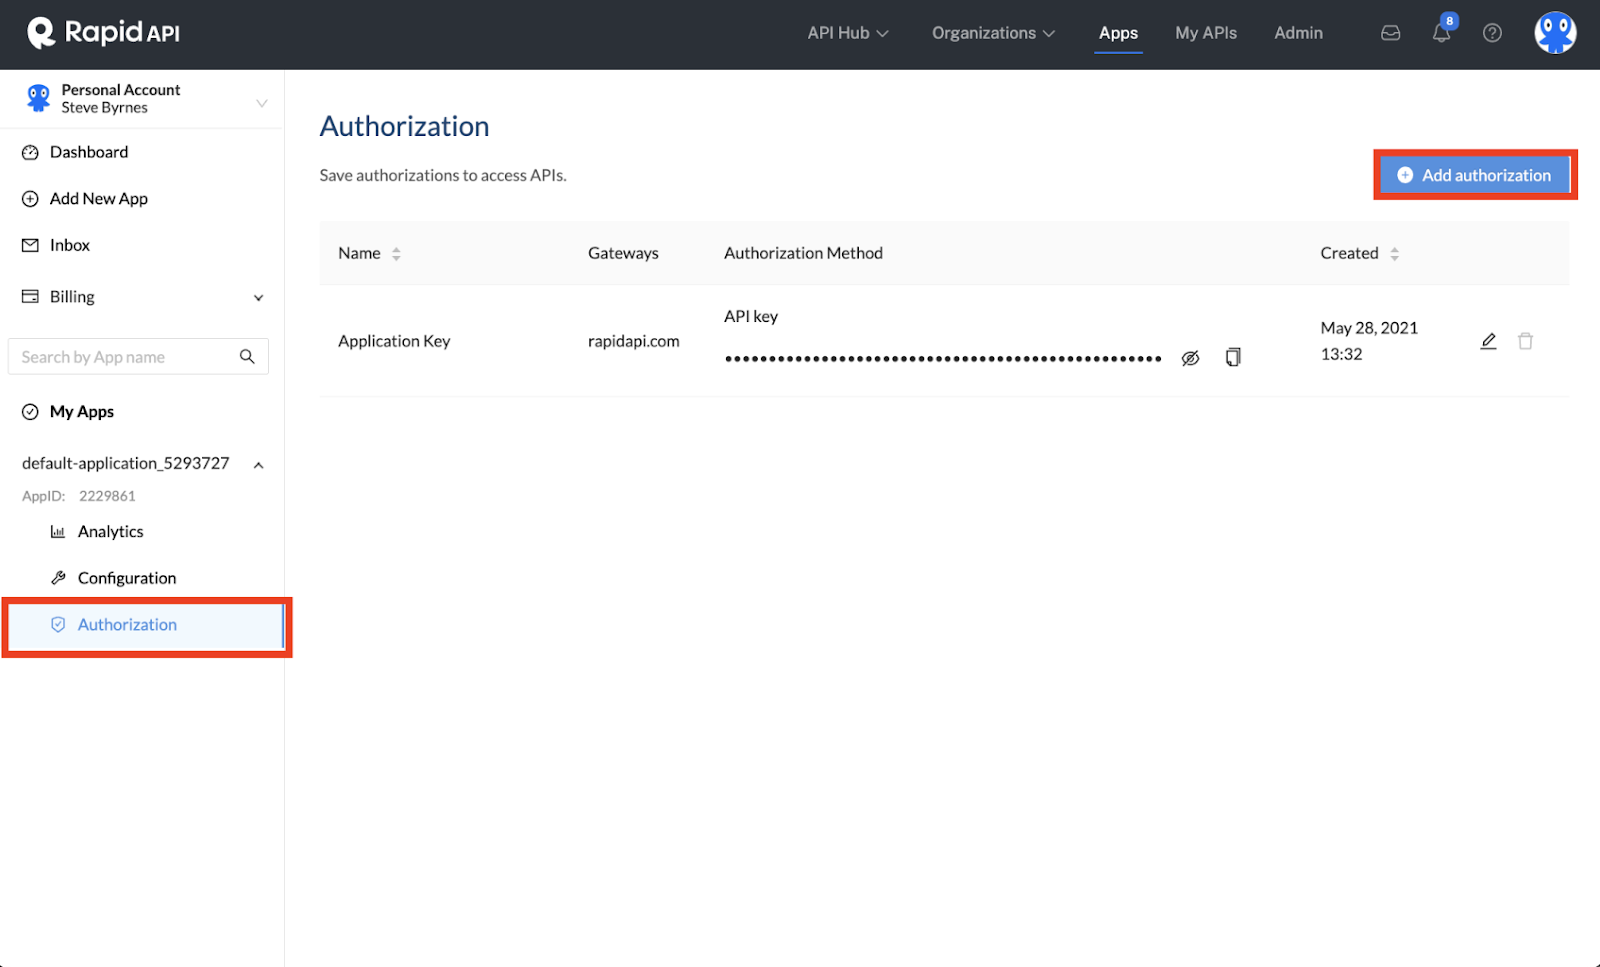
Generate an API Key #
- Navigate to the application you want to link with Tripcart in your Developer Dashboard.
- Select the app where you would like to create or replace a compromised key.
- Go to the Authorization section.
- Click Add authorization. Enter a name for the key and publish it.
- Your new API Key will now be created.
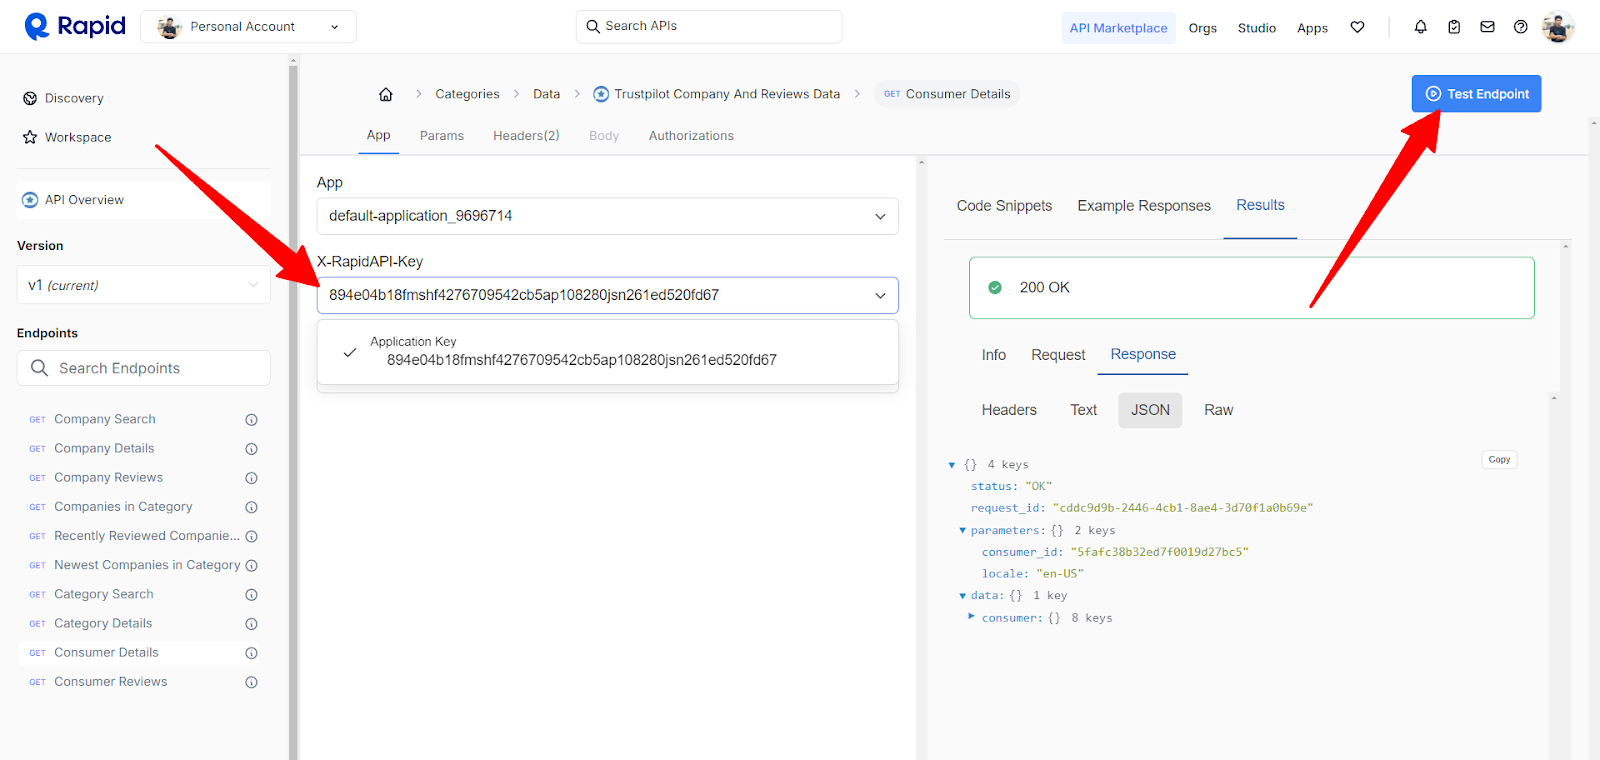
Test the API Key #
- Visit the Endpoints tab for your desired API on RapidAPI Hub.
- In the X-RapidAPI-Key dropdown, select the new key and click Test Endpoint to ensure it’s working.
- Once tested, you are ready to connect this key to Tripcart.
Tip: For security, rotate your API keys periodically. If needed, delete compromised keys from the Authorization page.
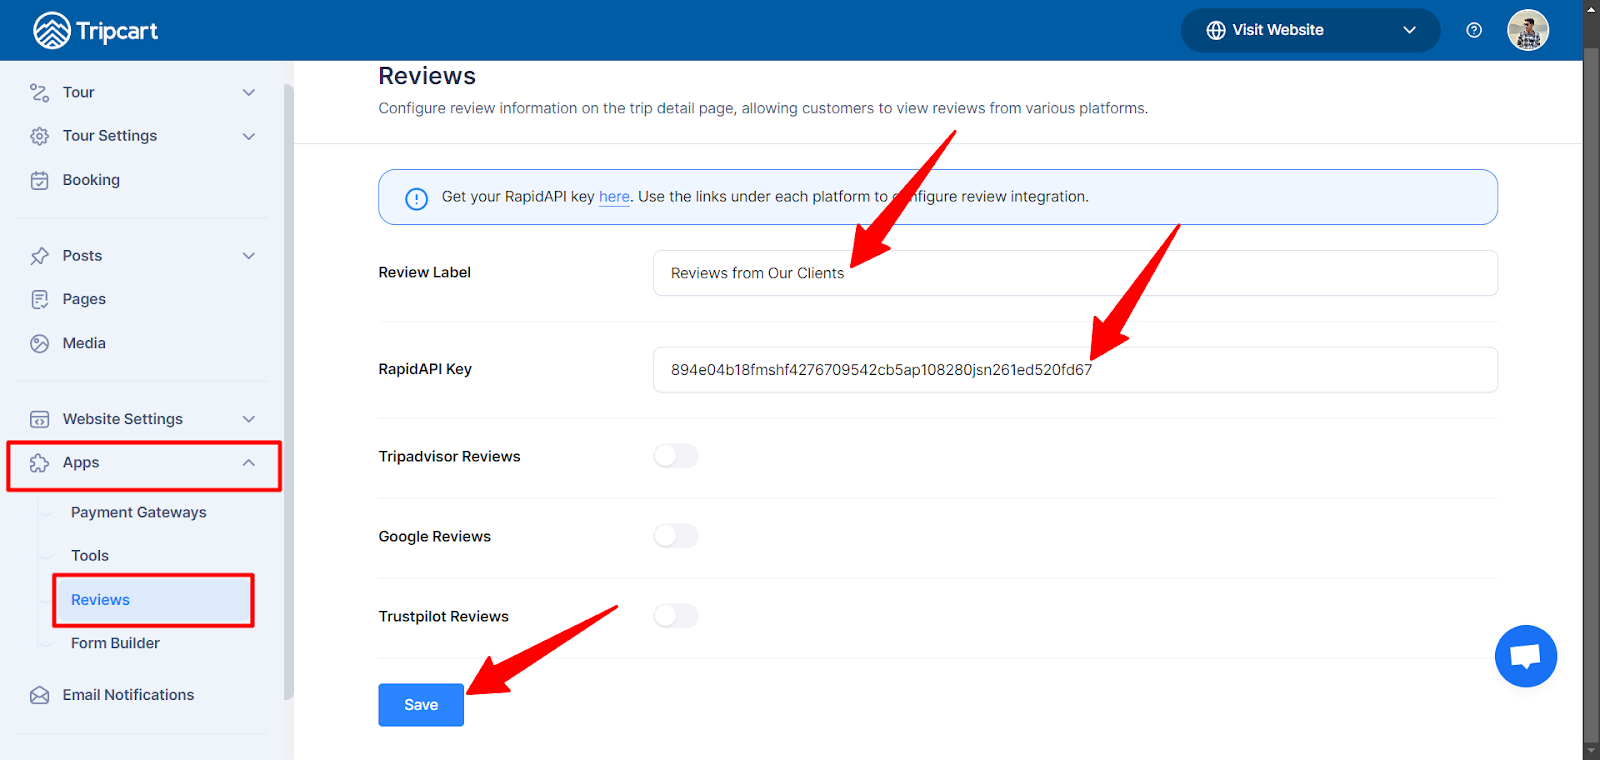
Adding the API Key to Tripcart #
Once your RapidAPI key is ready, you’ll need to add it to your Tripcart Reviews Settings. Follow these steps:
- Log in to Tripcart if you are already not logged in and navigate to the Apps section in Tripcart Dashboard.
- Under the Apps section, click on the Reviews tab.
- Enter the desired title in the Reviews Label field to display as the heading for the Reviews section on the trip details page (e.g., Customer Reviews, Traveler Feedback).
- Paste your RapidAPI key to the RapidAPI Key field. Finally, click the Save button to publish the changes.
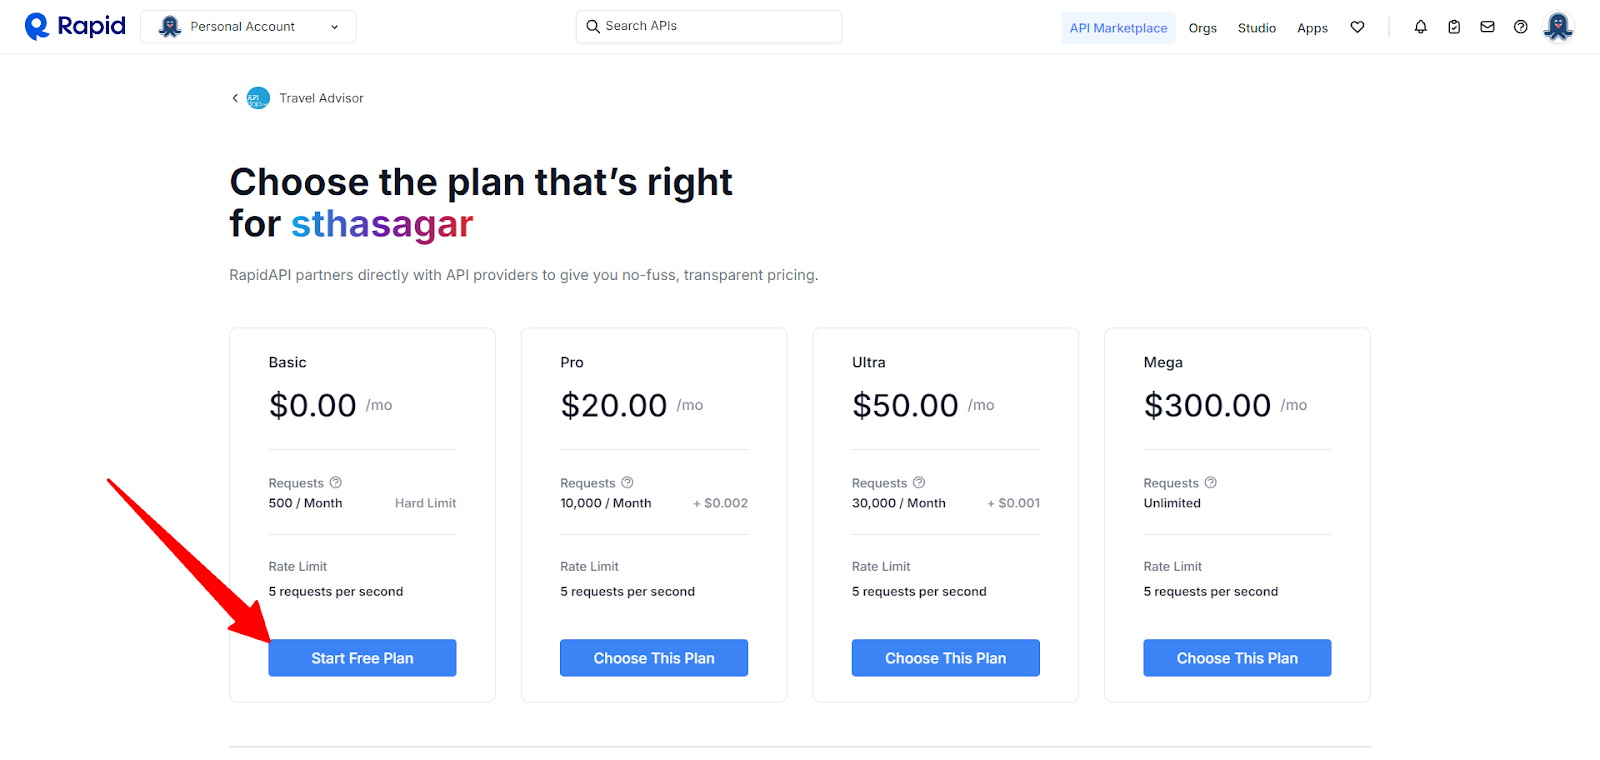
Subscribing to API Services #
Now that your RapidAPI key has been added, you need to subscribe to the relevant API services (Tripadvisor, Google Reviews, or Trustpilot) to enable review fetching.
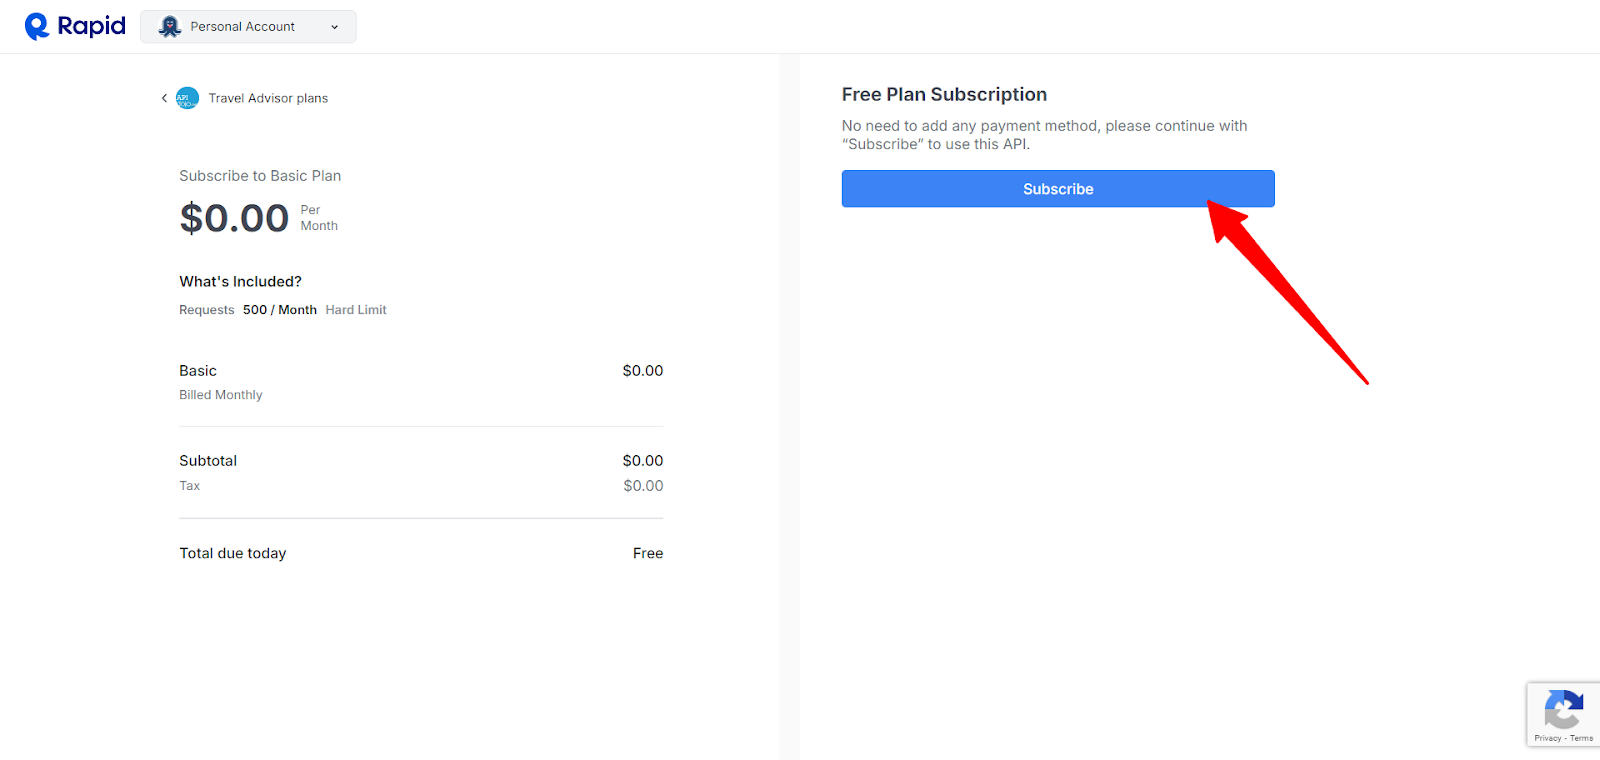
Subscribe to Tripadvisor Reviews API #
- Access the subscription link through Tripcart settings or use this Tripadvisor API: Tripadvisor API Subscribe Link.
- Click on the Subscribe to Test button.
- Choose the Free Plan or a plan that suits your needs.
- Click Subscribe.


Subscribe to Google Reviews API #
- Go to this link to subscribe to the Google Reviews API: Google Reviews Subscribe Link
- Select a subscription plan that fits your needs (Free or paid).
- Click Subscribe.
Subscribe to Trustpilot Reviews API #
- Go to this link to subscribe to the Trustpilot Reviews API: Trustpilot Reviews Subscribe Link
- Select a subscription plan that fits your needs (Free or paid).
- Click Subscribe.
Enabling Reviews from Each Platform in Tripcart #
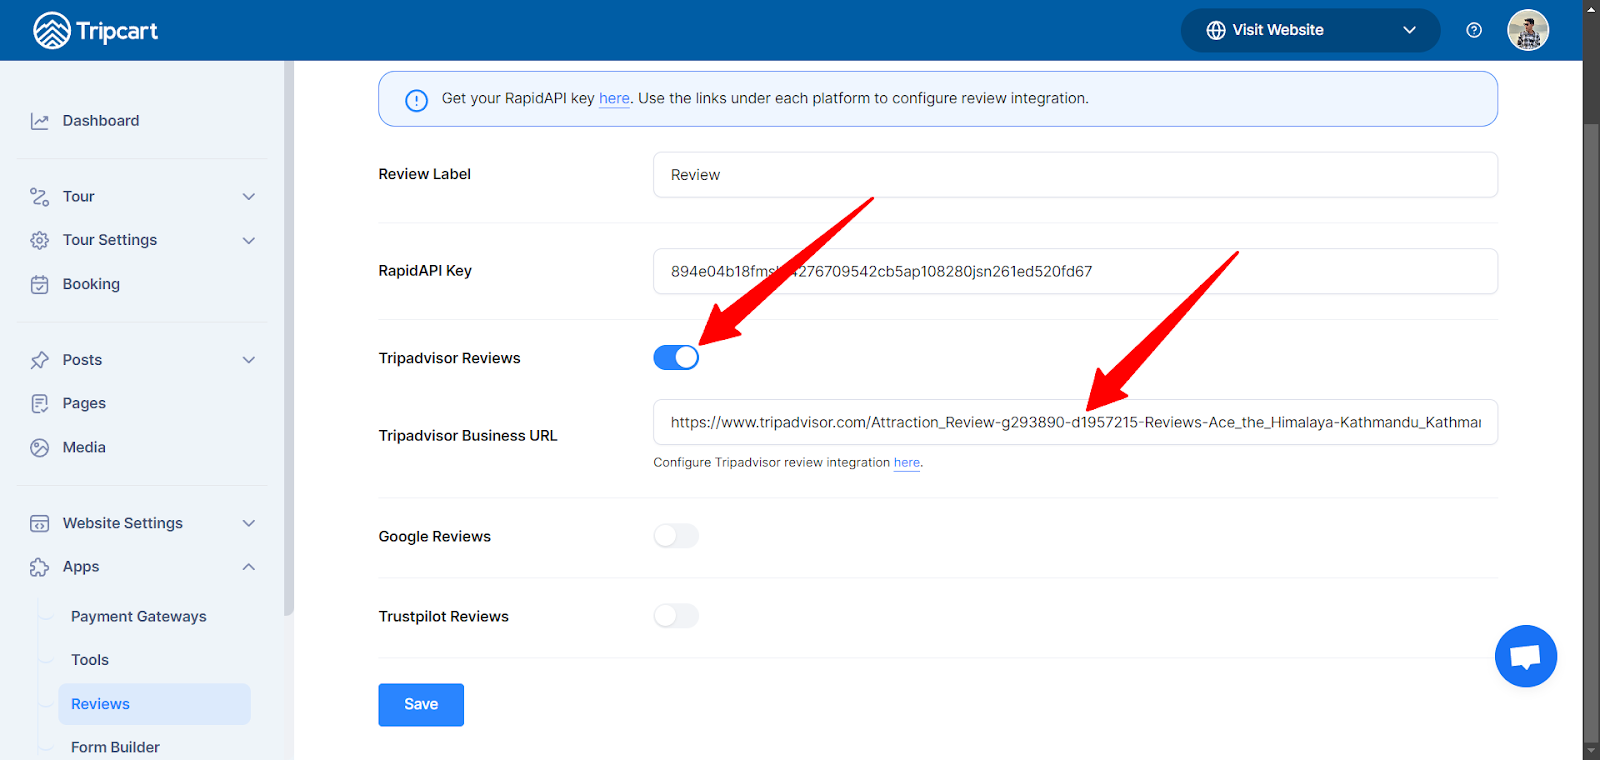
Enable Tripadvisor Reviews: #
Now that you’re subscribed to the Tripadvisor API, you can easily enable Tripadvisor Reviews in Tripcart.
- In your Tripcart Settings under Reviews, toggle the Tripadvisor Reviews option to On.
- Paste your Tripadvisor Business URL into the provided field.
- Click Save.
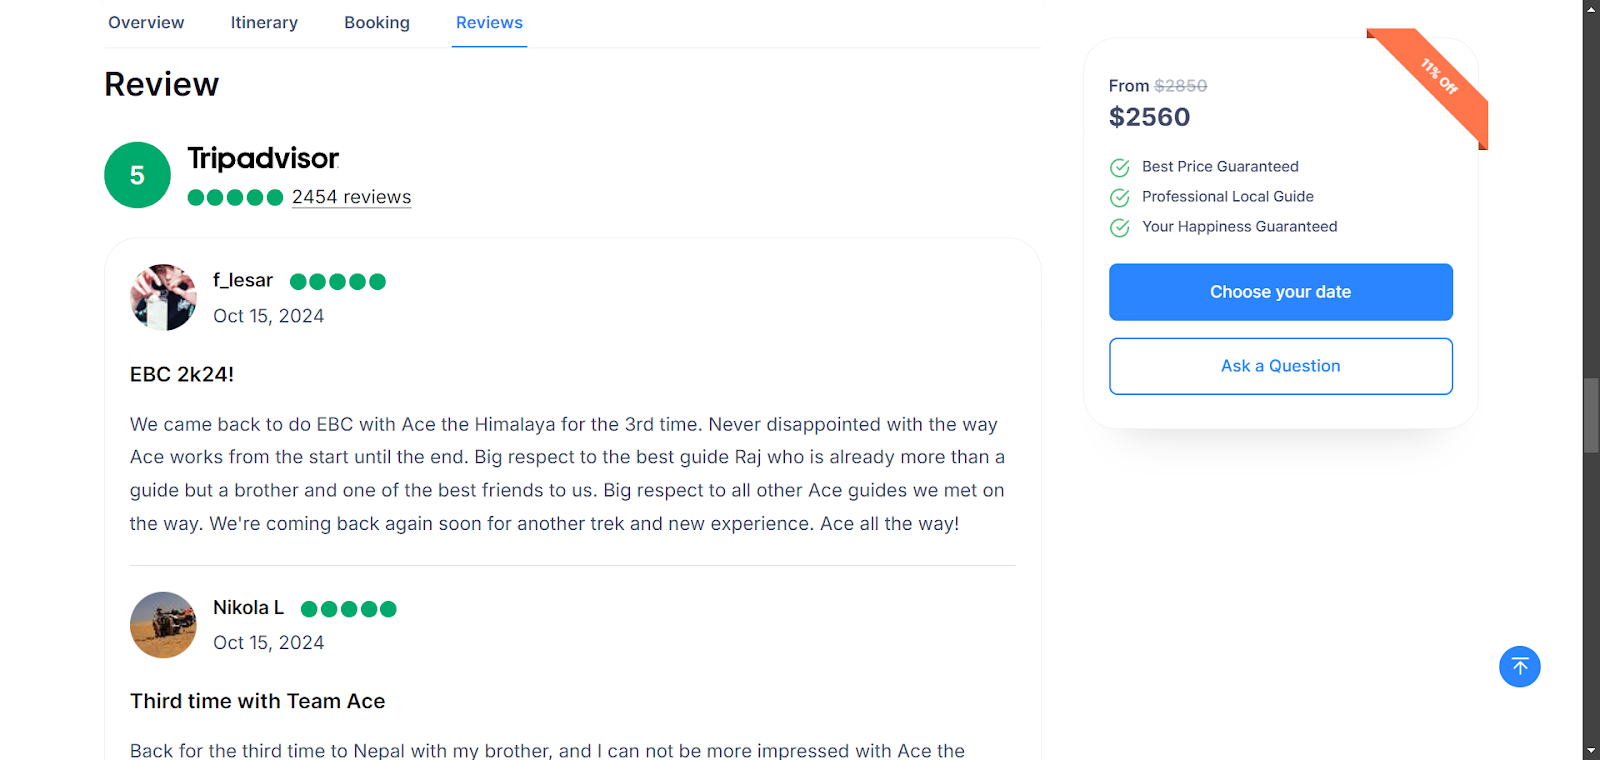
Once the settings are saved, Tripcart will start pulling reviews from Tripadvisor and display them on your Trip Detail Page. Below is a screenshot for reference on how the Tripadvisor reviews will be displayed:
Enable Google Reviews in Tripcart #
Unlike Tripadvisor and Trustpilot, where you provide a business URL, Google Reviews requires a Place ID. Below are the steps to configure Google Reviews in Tripcart.
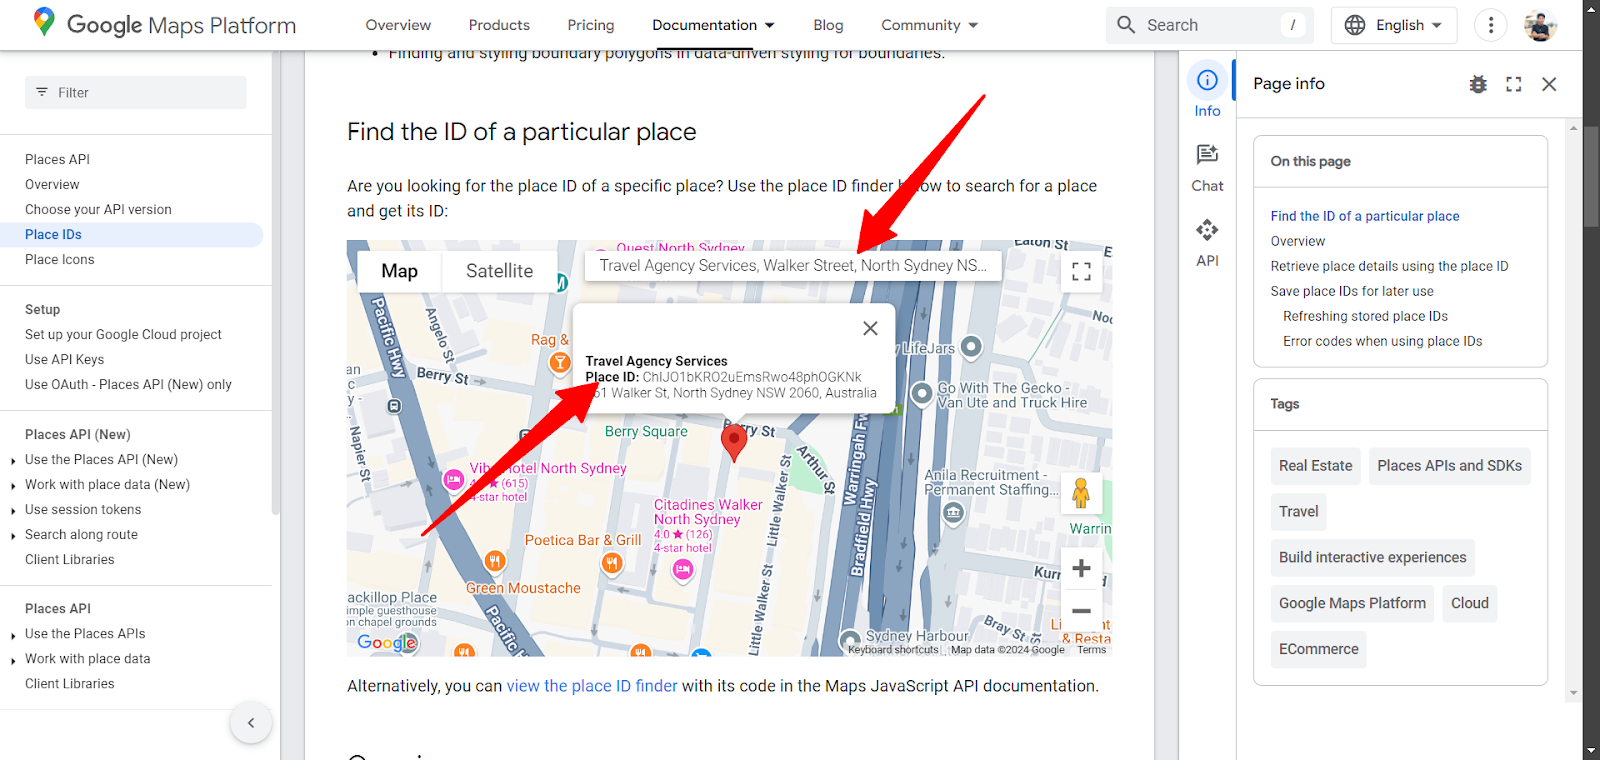
Finding the Google Place ID #
You’ll need your business’s Place ID to pull reviews from Google. Follow these steps to find it:
- Go to the Google Place ID Finder.
- In the search bar, enter your business name or location.
- A map will display your business details, including the Place ID.
- Copy the Place ID for use in Tripcart.
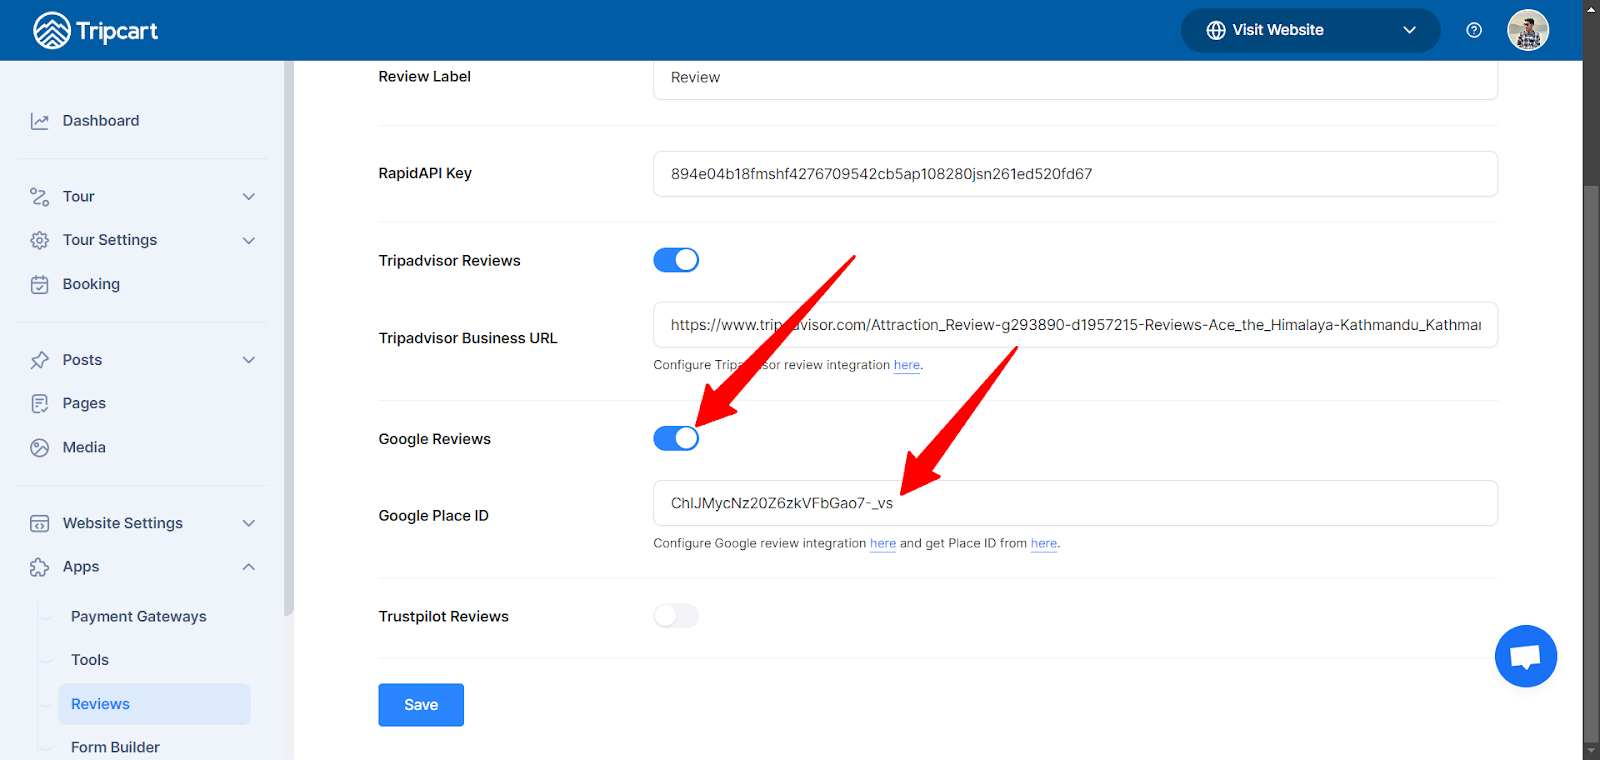
Configure Google Reviews Settings #
Once you have your Place ID, follow the below steps to enable Google Reviews:
- In your Tripcart Settings under the Reviews section, toggle the Google Reviews option to On.
- Paste your Google Place ID into the designated field.
- Click Save.
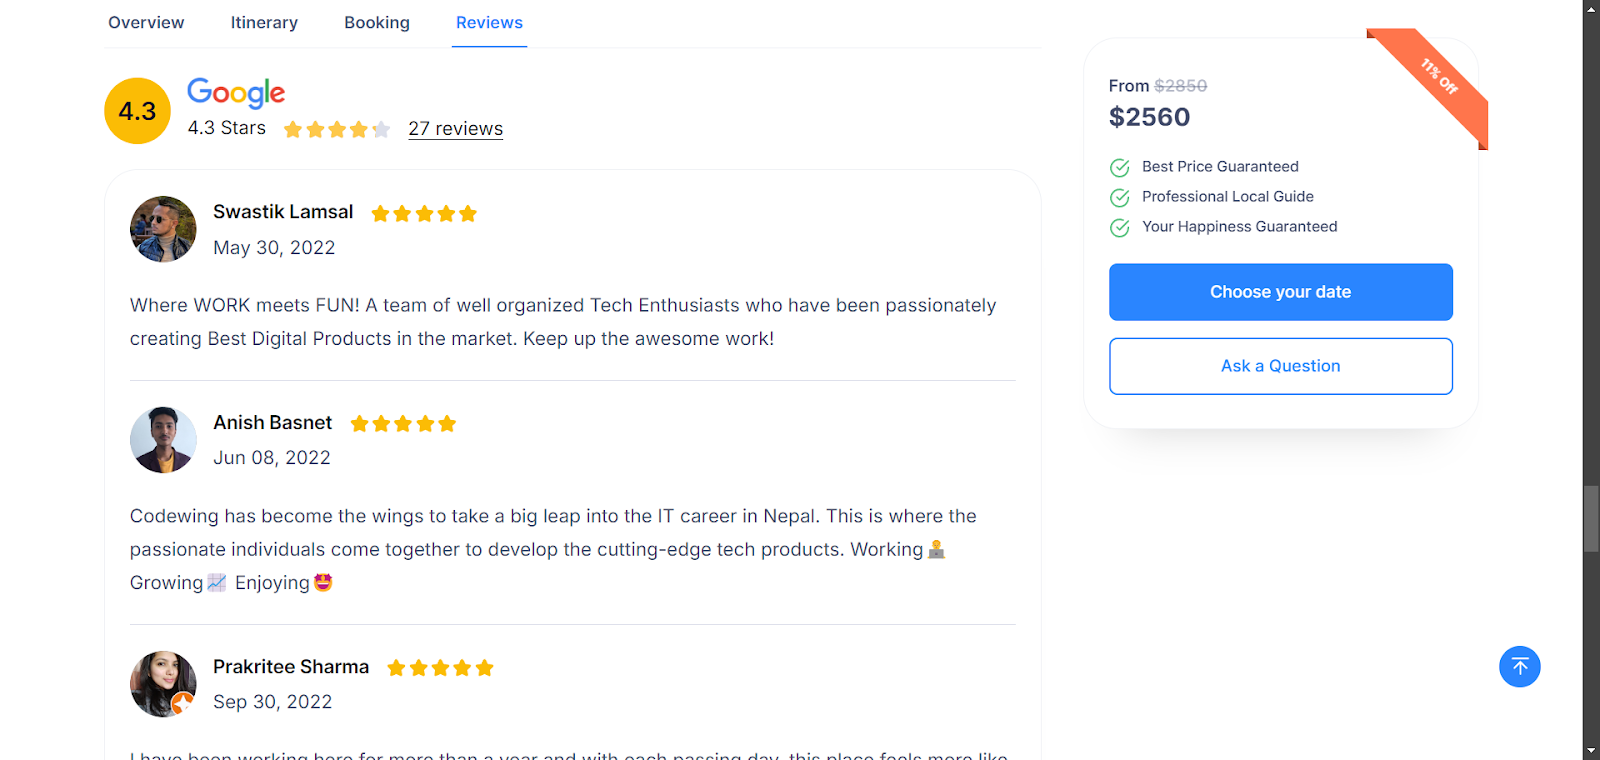
Once saved, Tripcart will start pulling reviews from Google and displaying them on your Trip Detail Page. Below is a screenshot for reference on how the Google reviews will be displayed:
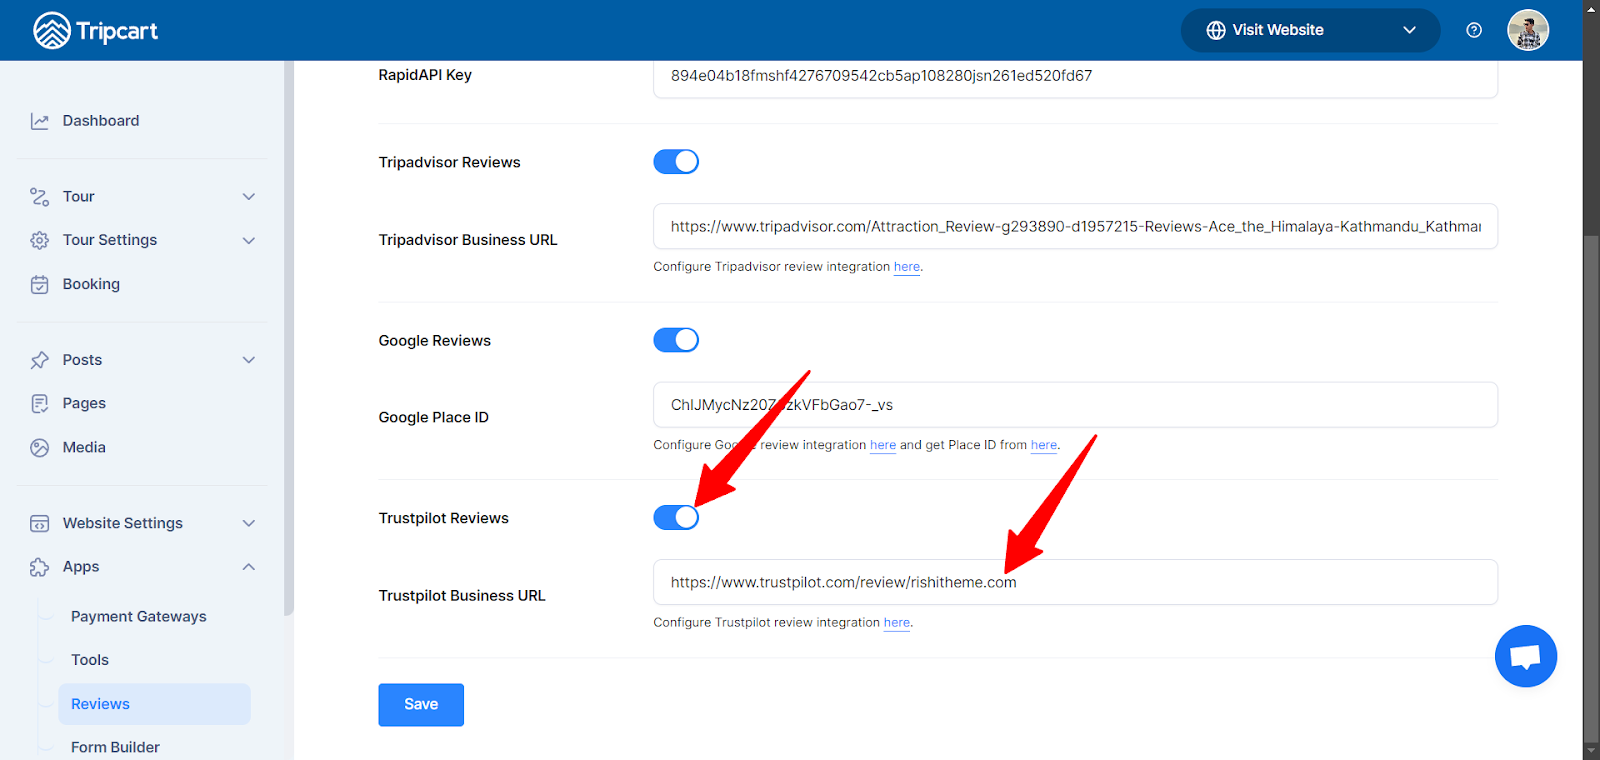
Enable Trustpilot Reviews in Tripcart #
- In your Tripcart Settings under the Reviews section, toggle the Trustpilot Reviews option to On.
- Paste your Trustpilot Business URL into the provided field.
- Click Save.
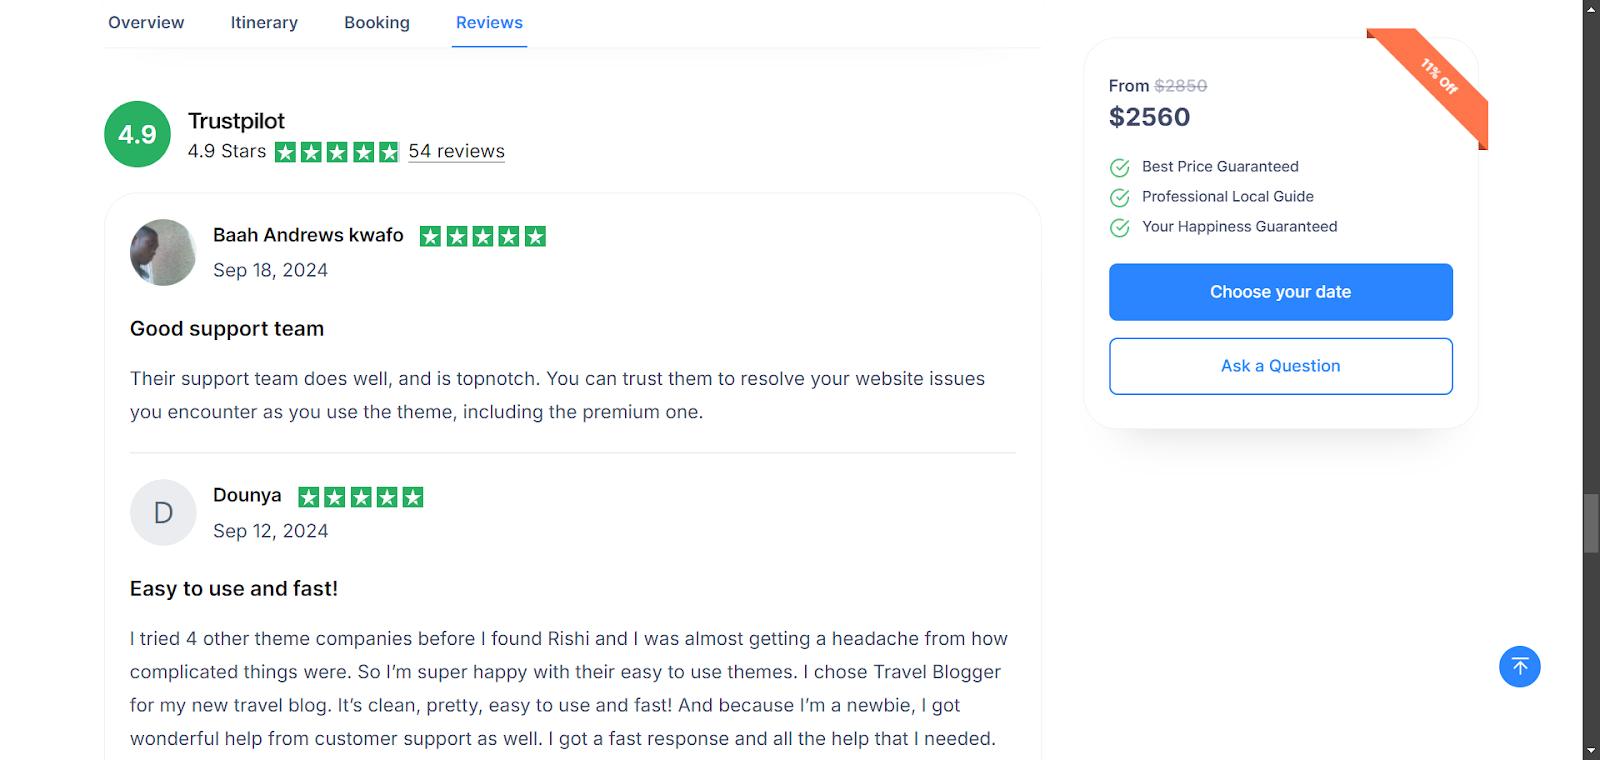
Once saved, Tripcart will start pulling reviews from Trustpilot and displaying them on your Trip Detail Page. Below is a screenshot for reference on how the Trustpilot reviews will be displayed:
Additional Notes: #
- Reviews will automatically refresh periodically based on the API subscription plan.
- If you encounter any issues with API connections, test the API directly on RapidAPI Hub using the Test Endpoint feature.
By following these steps, you’ll successfully integrate reviews from multiple platforms, improving your customers’ trust in your tours by displaying real user feedback.
If you need any additional help, contact the Tripcart Support Team or refer to the API documentation for detailed information on specific endpoints.