The Checkout Form Editor is a powerful tool in Tripcart that allows travel agencies to customize the traveler information fields displayed during the checkout process. Whether you’re collecting simple contact information or detailed travel preferences, the editor makes it easy to customize your form to your business needs.
To configure the Checkout Form Editor:
- Locate and click on Checkout Form Editor
- Go to Dashboard > Apps > Tools
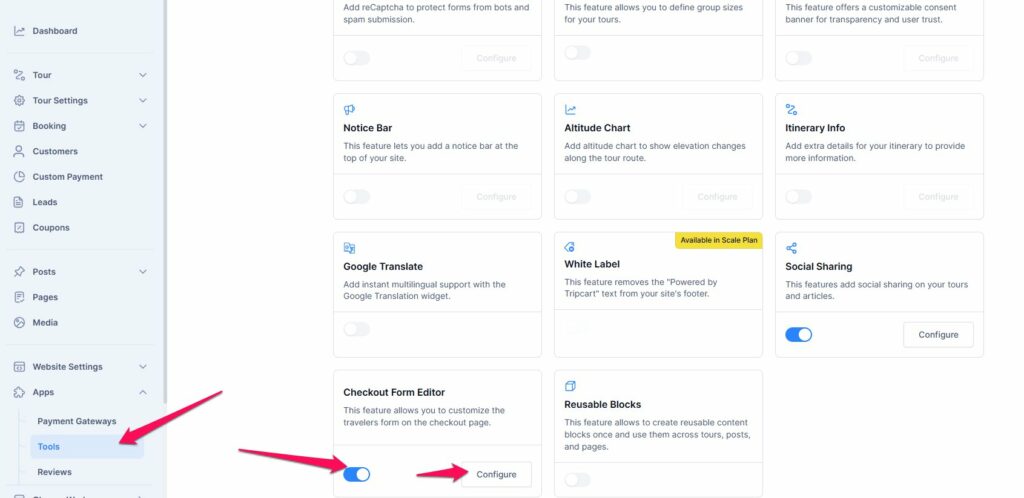
- This feature is enabled by default. To edit the Checkout Form Editor, click on Configure.
- Alternatively, you can access it via Dashboard > Apps > Checkout Form Editor.
- Here you will file the option to edit Lead Traveler, Additional Traveler and Settings.
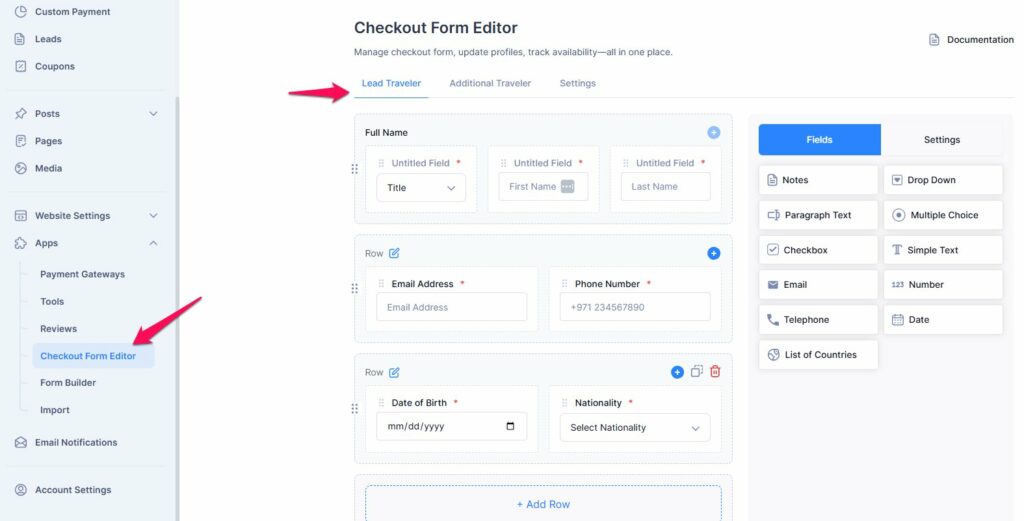
Lead Traveler #
The Lead Traveler section allows you to customize the information collected during checkout. Here’s how it works:
- You can edit the Lead Traveler information as needed.
- The first two rows (Title,Name, Email Address, and Phone Number) are default and cannot be deleted.
- You can also add another column in the second and third rows by clicking the “+” button.
- The third row is flexible — you can delete or duplicate it.
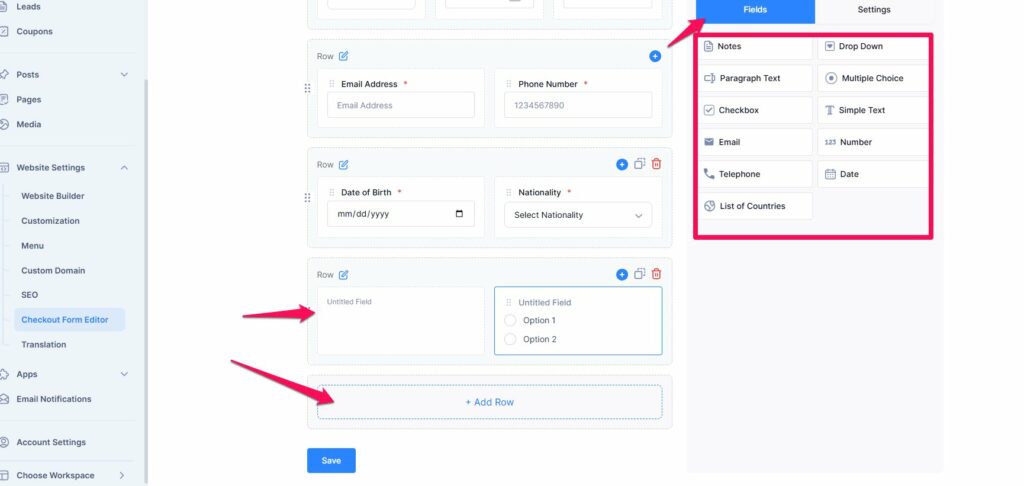
- To add more rows to the Checkout page, click the “Add Row” button.
- You can drag and drop fields into these rows easily.
- Each row can hold up to 3 fields.
- You can duplicate or delete any added row using the respective icons.
To add more fields:
- Click “Add Row.”
- Drag and drop fields from the options
- Add a maximum of 3 fields per row
- After making all the necessary changes, click the “Save” button to apply them.
Field Types You Can Add #
- Notes: Add instructional or informative text that doesn’t require user input.
- Dropdown: Add a selectable list of options from a dropdown menu.
- Paragraph Text: Allows users to enter long, multi-line input.
- Multiple Choice: Add radio buttons to allow the user to select one option.
- Checkbox: Add one or more checkboxes for multiple selections.
- Simple Text: A basic single-line input for short text entries.
- Email: Validates input as an email address.
- Number: Allows only numeric input.
- Telephone: Use this for phone numbers.
- Date: Lets the user select a date using a date picker.
- List of Countries: Adds a pre-filled dropdown containing a list of countries.

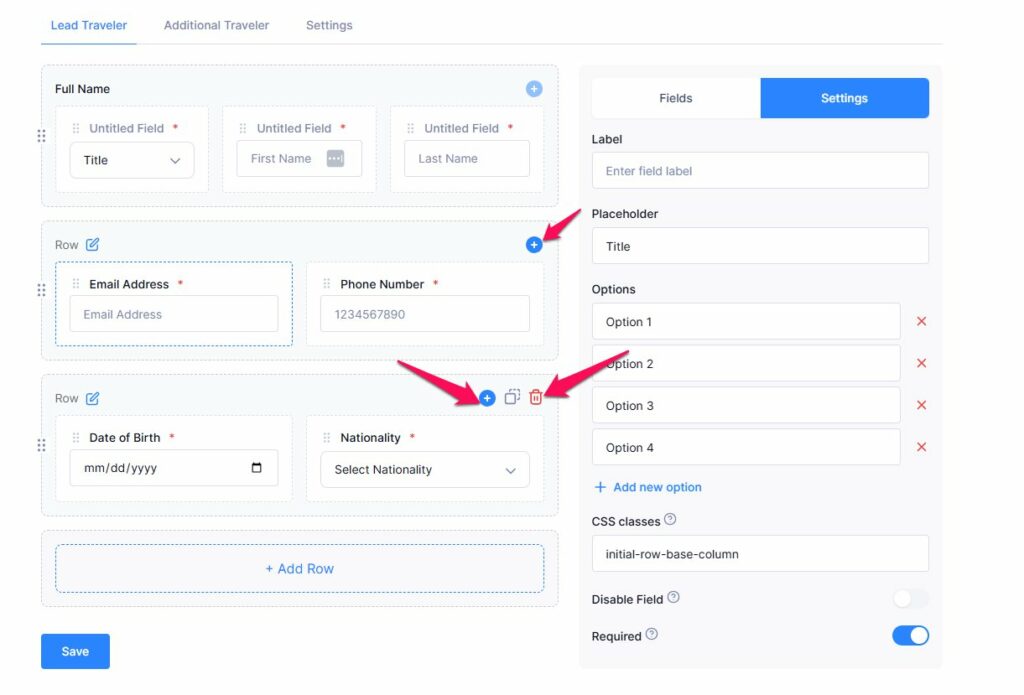
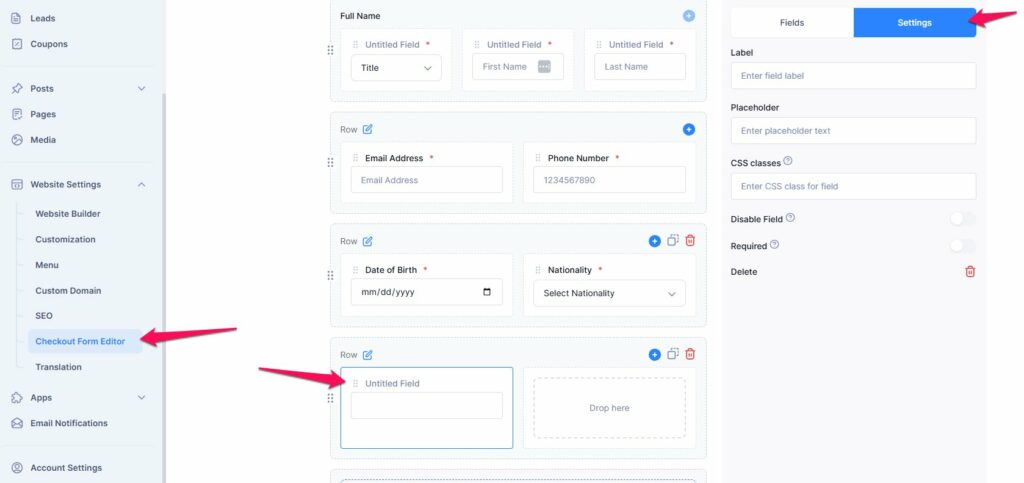
Field Editor Settings #
To edit any field:
- Click directly on the field inside the form editor.
- The Field Settings panel will appear, where you can modify the following:
- Label: Change the title of the field. You can localize this to any language.
- Placeholder: Set example or hint text shown inside the field input.
- CSS Classes: Add custom CSS class names to style the field container (multiple class names should be space-separated).
- Disable Field: Use the toggle to disable the field (it will be visible but not editable on the frontend).
- Required: Enable this toggle to make the field mandatory before the user can proceed.
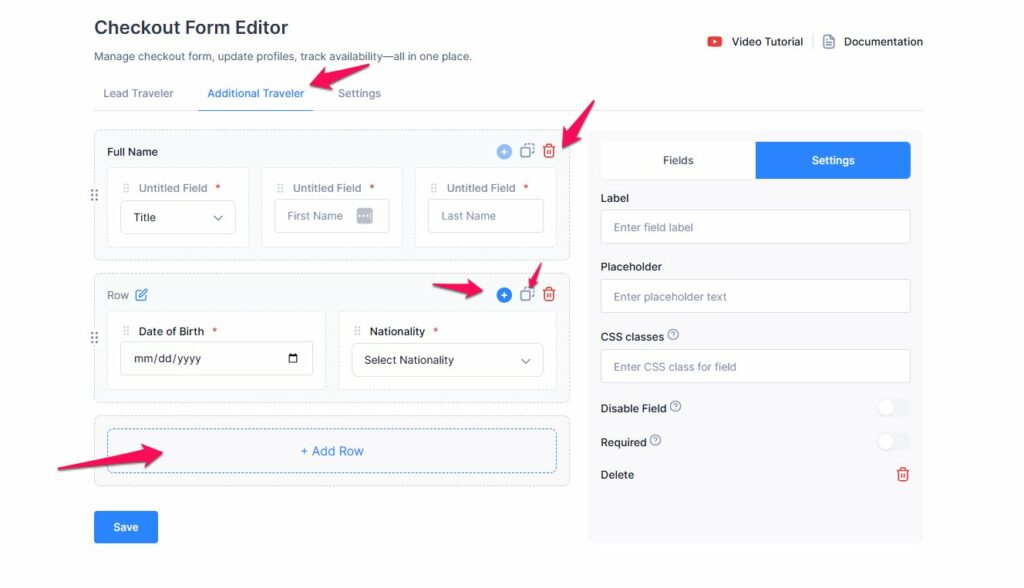
Additional Traveler #
This section is similar to the Lead Traveler section but applies to accompanying travelers.
You can:
- Add new rows and fields
- Edit, duplicate, or delete existing fields
- Completely remove the section if not needed
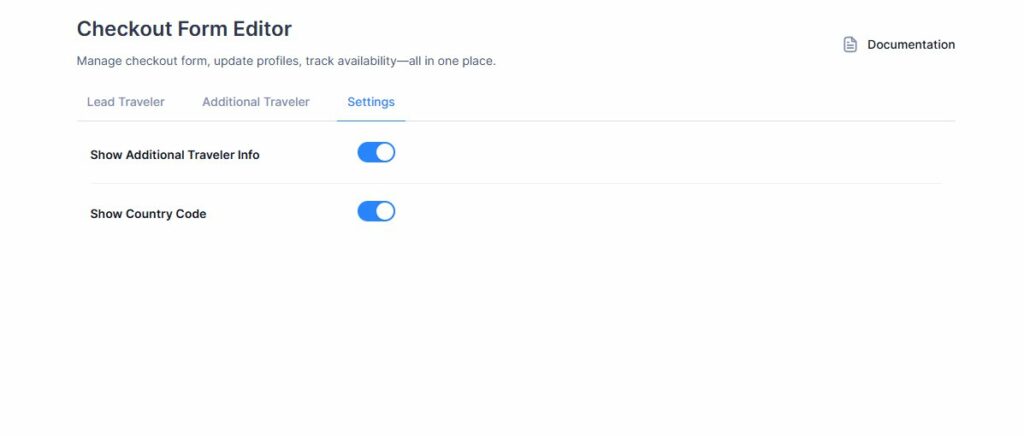
Settings #
Show Additional Traveler Info: This setting allows you to remove the Additional Traveler form entirely from the checkout page. To do so, simply disable the toggle to hide the Additional Traveler form from the checkout page.
Show Country Code: To require visitors to include the country code when entering their phone number in the checkout form, simply enable the Show Country Code toggle. By default, It is enabled.