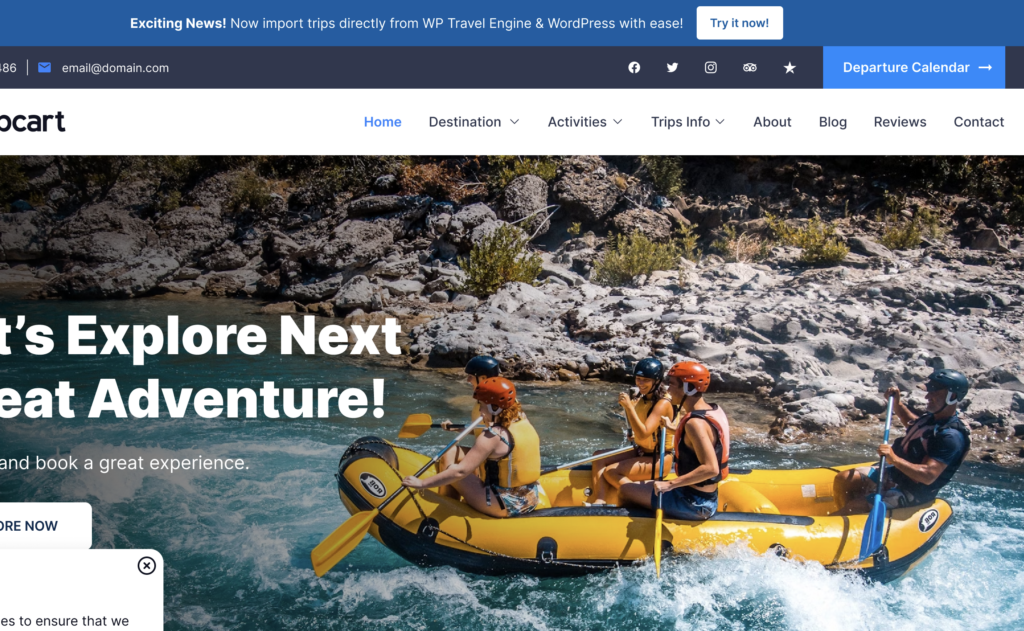
The Notice Bar is an additional feature that allows you to display a notification bar at the top of your website. It can be used to highlight special announcements, promotions, or important messages. You can configure the Notice Bar with a button link and custom styling.
Follow the steps below to enable and configure the Notice Bar in Tripcart.
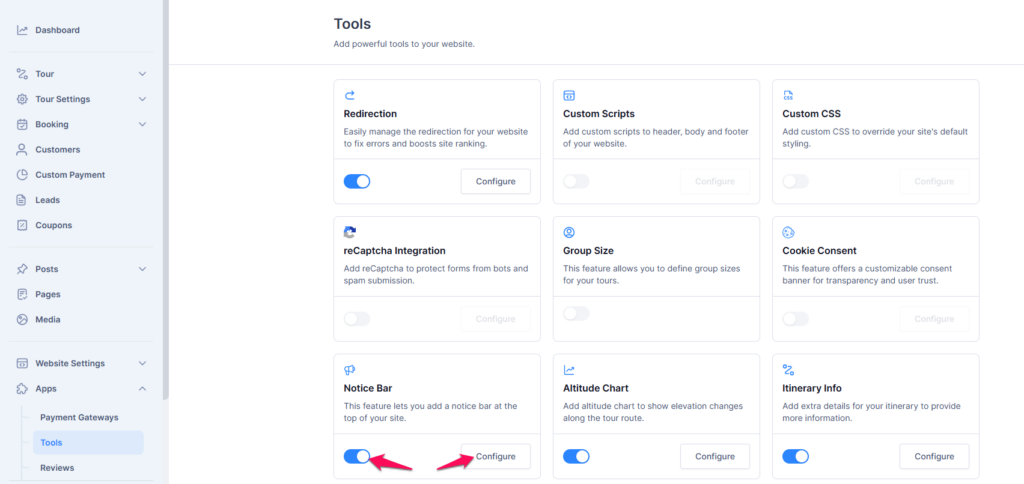
Step 1: Enable the Notice Bar Tool #
- Navigate to the Dashboard.
- Go to Apps > Tools.
- Locate the Notice Bar feature.
- Enable the toggle switch to activate the tool.
- Click the Configure button to set up the Notice Bar.
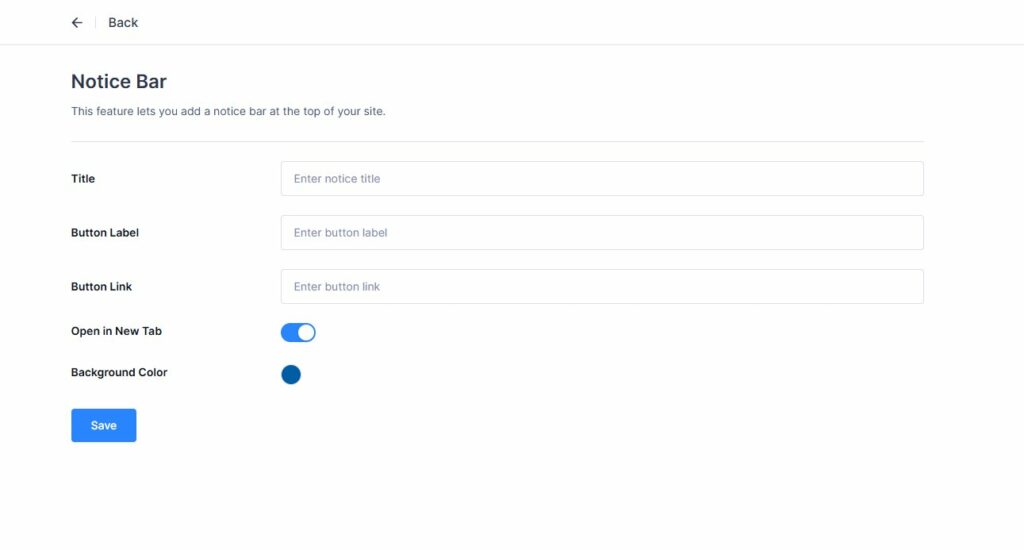
Step 2: Configure the Notice Bar #
- In the configuration page, enter the Title for the Notice Bar.
- Set the Button Label (e.g., “Learn More”, “Book Now”, etc.).
- Add the Button Link where the button should redirect users.
- Choose whether the link should Open in a New Tab (enable/disable toggle).
- Select the Background Color for the Notice Bar.
- Click Save to apply the changes.
Step 3: View and Manage the Notice Bar #
- Once configured, the Notice Bar will appear at the top of your website.
- Users can close the Notice Bar by clicking the close (X) button on the right side.
- After closing, the Notice Bar will not be displayed again for 24 hours for that user.
- To make changes, revisit Dashboard > Apps > Tools > Notice Bar > Configure.