Tripcart has integrated with reCAPTCHA, a free service that protects your website from spam and abuse. Please note, these settings are required only if you decide to use the reCAPTCHA field. You need to generate an API key and API secret using reCAPTCHA.
Accessing reCAPTCHA Settings #
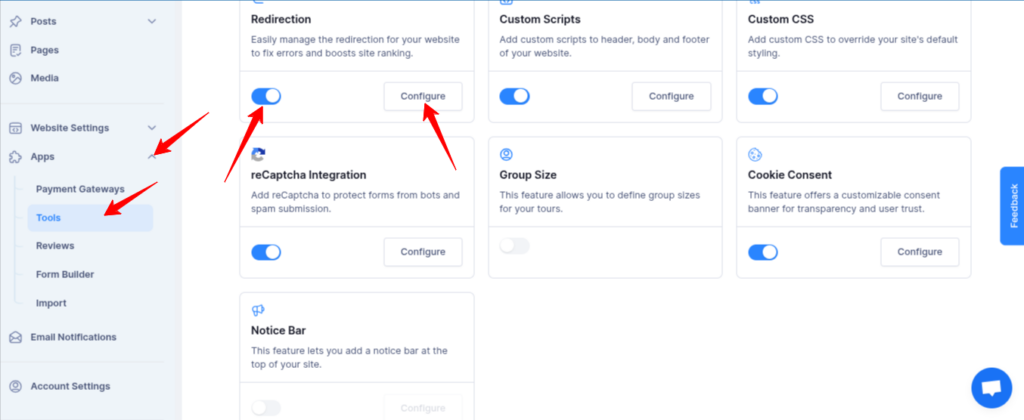
- Log in to the Tripcart Dashboard.
- In the left sidebar, navigate to Apps > Tools.
- Locate the reCAPTCHA Integration option.
- Toggle the switch to Enable reCAPTCHA Integration.
- Click the Configure button to proceed.
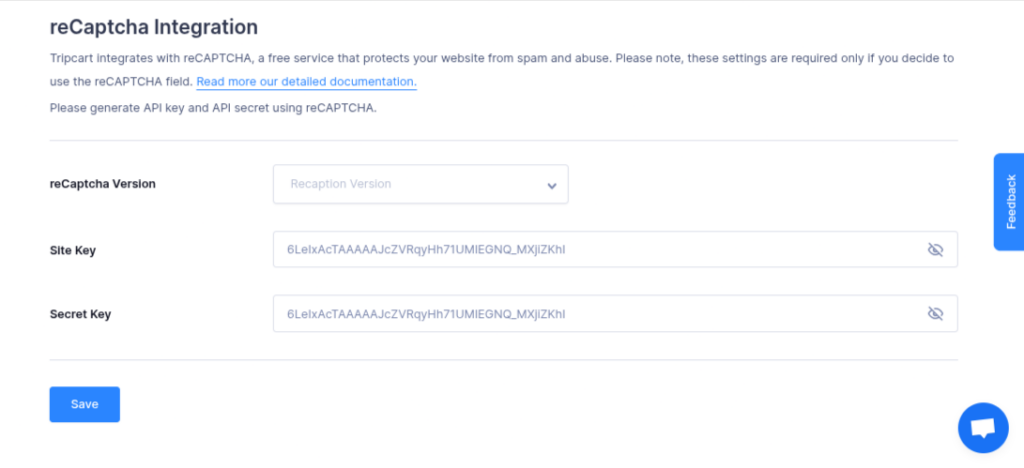
Configuring reCAPTCHA Integration #
- Select the reCAPTCHA Version you want to use (e.g., v2 or v3).
- Enter your Site Key provided by Google.
- Enter your Secret Key provided by Google.
- Click Save to apply the settings.
By following these steps, you can enhance your site’s security and reduce spam effectively.
📧 If you face any issues or have questions, please reach out to our support team or initiate the chat located on the right.