
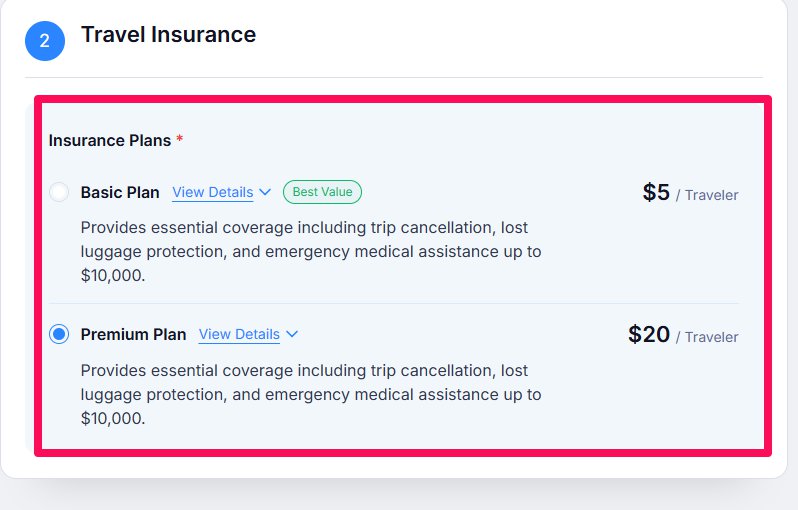
The Travel Insurance tool in Tripcart is designed for tour companies that want to offer travel insurance directly within their booking process. This feature is available in the Accelerate and Scale plan. This feature enables companies to create, manage, and attach insurance plans to tours, ensuring travelers are protected against unforeseen events during their trips. You can find a list of Insurance Plans on the checkout page.
Why Travel Insurance is Important for Tour Companies #
Travel insurance provides peace of mind and financial protection for both travelers and tour companies.
- Risk Management: Protects travelers from unexpected incidents such as medical emergencies, trip cancellations, and lost luggage.
- Customer Trust: Offering insurance builds credibility and assures clients that you care about their safety.
- Revenue Opportunity: Insurance plans can generate additional income for your business.
- Reduced Liability: Helps limit the company’s responsibility in case of trip disruptions.
- Competitive Advantage: Differentiates your services from competitors that do not provide insurance options.
How to Configure Travel Insurance in Tripcart #
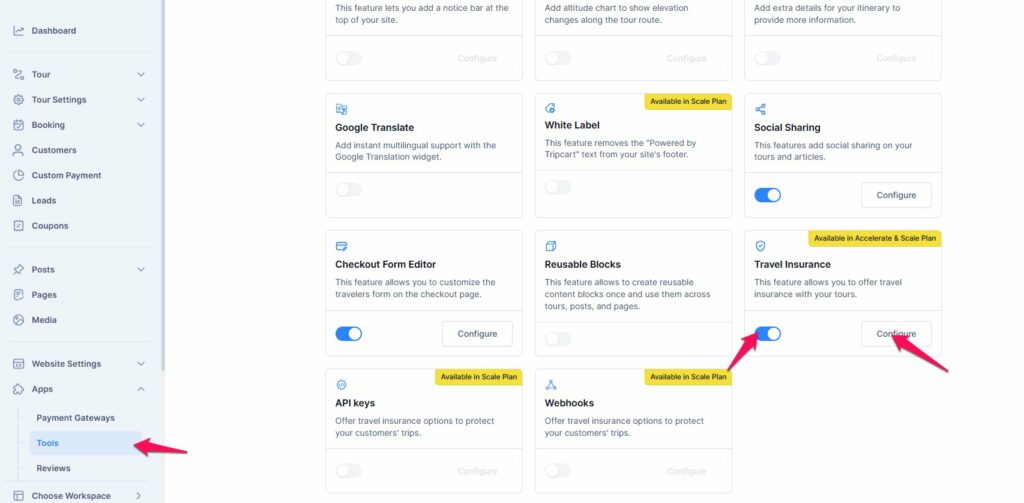
- You can configure Travel Insurance by going to Dashboard > Apps > Tools. From there, enable the Travel Insurance tool.
- Click the Configure button to set it up, or after enabling, you can access the settings anytime via Dashboard > Apps > Travel Insurance.
Checkout Page Fields Settings #
You can configure the Checkout Page Fields after enabling the Travel Insurance settings in the app. The Travel Insurance option will appear under Apps. Click on Travel Insurance to adjust its settings.
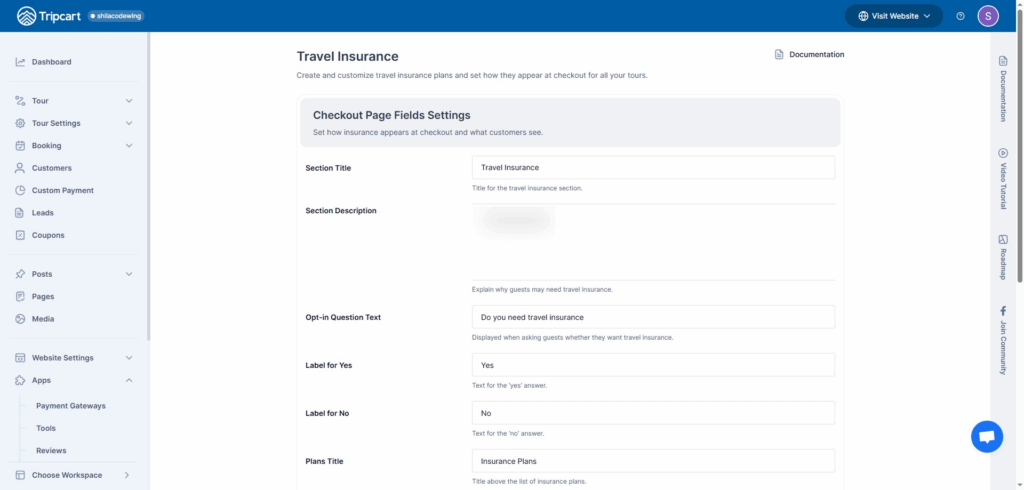
- Section Title: Add a clear and concise title for the Travel Insurance section, such as “Travel Insurance” or “Protect Your Trip”.
- Section Description: Provide a brief description explaining the importance of travel insurance. Example: “Travel insurance helps protect you from unexpected events such as trip cancellations, medical emergencies, and lost luggage.”
Use the following block types to create the description:- Text
- Headings
- List
- Opt-in Question Text: Add a question to encourage users to opt in for travel insurance.
Example:
“Would you like to add travel insurance to your booking?”
- Add a Label for Yes and No Radio Buttons.
- Plan Title: Use a clear title for the insurance plans section, such as “Available Plans” or “Choose Your Insurance Plan”.
- Plan Details Button Label: Use a button label like “View Plan Details” or “See Coverage Details” to allow users to learn more about each plan.
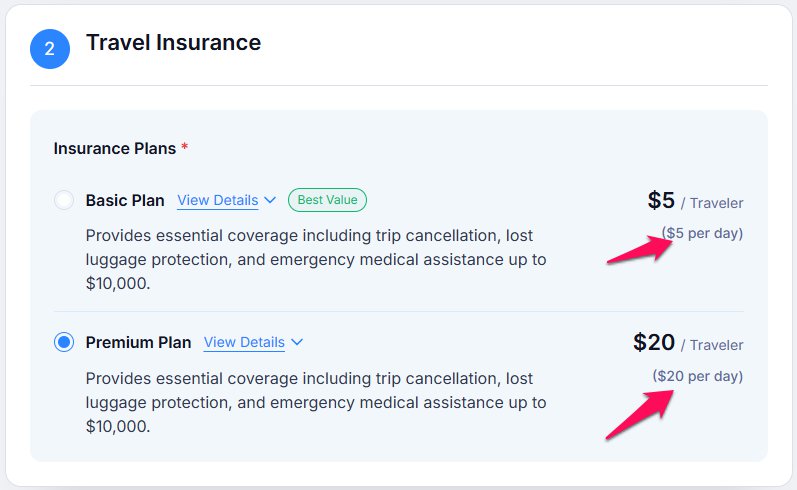
- Show Per Day Pricing: Enable the option to show a pricing breakdown per day within the insurance details, so users can see daily costs.
How to Add a Travel Insurance Plan #
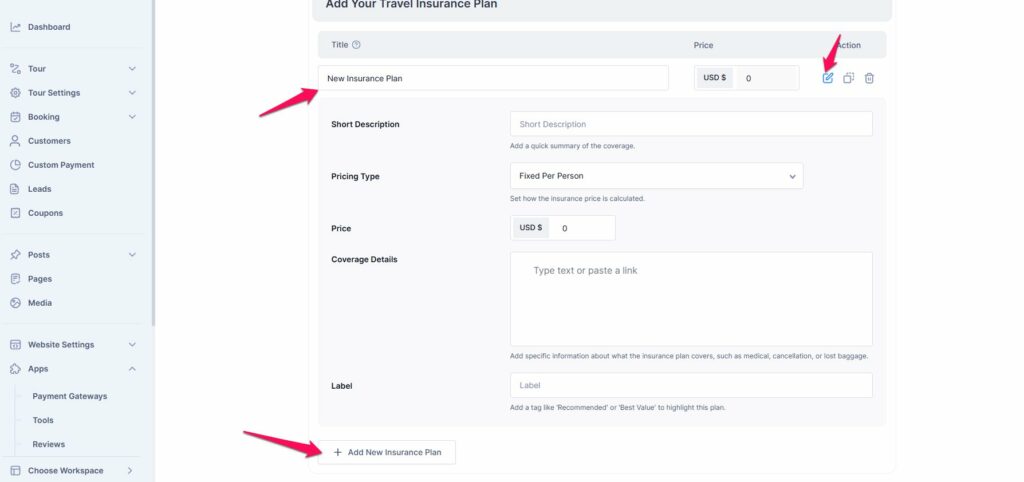
- Locate and click the “Add New Insurance Plan” button.
- Enter the name of the plan (e.g., Basic, Premium).
- After adding the name, click the Edit button to update the plan details.
- Add a short description outlining the key features of the plan.
- Choose the Pricing Type:
- Fixed per person: The price you set applies to each individual traveler. For example, if there are multiple travelers, each one will be charged this fixed amount.
- Percentage of Tour Cost: The price is calculated as a percentage of the total trip cost, which includes all travelers as well as any accommodation or add-on costs you’ve purchased. This total is then divided among all travelers.
- You can specify pricing for both per person and per trip, using fixed amounts or percentages as needed.
- Add Coverage Details by including content blocks such as titles, text, headings, and lists to clearly explain what the plan covers.
- Add a Plan Label to highlight special plans, such as “Best Plan” or “Recommended”.
How to Add Travel Insurance to a Single Tour #
In addition to adding insurance plans globally, you can also configure travel insurance for an individual tour directly from the tour settings.
Steps to Add Travel Insurance for a Single Tour #
- Navigate to the Tour Settings
- Go to Dashboard > Tours > All Tours.
- Choose the specific tour you want to edit.
- Open the Travel Insurance tab for that tour.
- Enable Travel Insurance
- Turn on the toggle to make Travel Insurance mandatory for this tour.
- When enabled, travelers booking this tour will be required to select an insurance option before checkout.
- Choose the Travel Insurance Type
You can select from two types of insurance: Global Insurance and Affiliate Link.- Global Insurance
- Choose Travel Insurance: Refers to the insurance plans you’ve already added in the App>Travel Insurance. Allows you to choose one or multiple plans for this tour.
- Once selected, you can:
- Edit the description of each plan specifically for this tour.
- Add Coverage Details that is applied for this particular tour.
- Update the price for this tour (overrides the global price for this tour).
- Edit the label (e.g., “Best Plan”, “Recommended” for this tour only).
- Each insurance plan has its own radio button. When you select a plan, it will be set as the default insurance option on the checkout page. However, users can still choose any other available plan from the list.
- Global Insurance
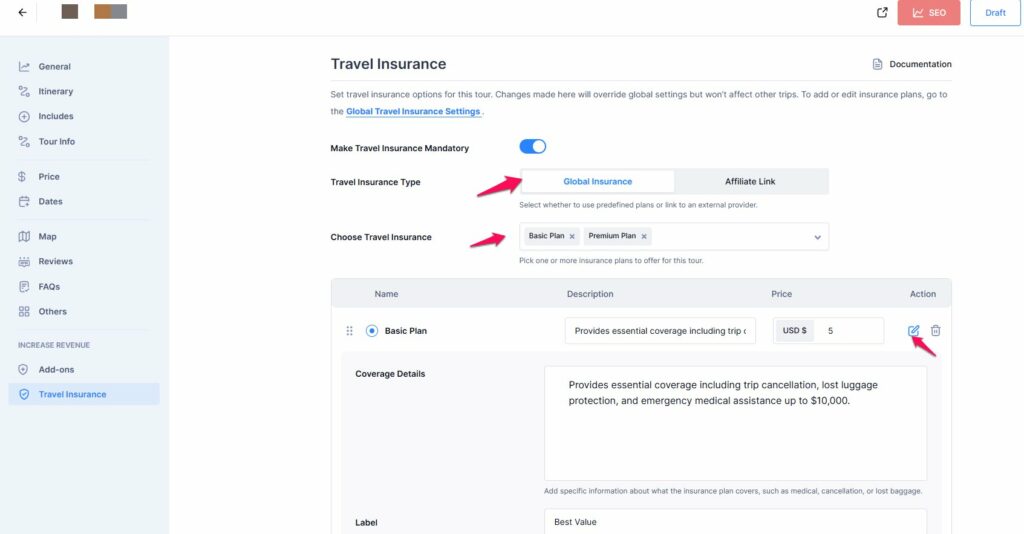
Note: Changes made here will only apply to this specific tour, not to the global settings.
- Affiliate Link
- Use this option to link to an external travel insurance provider’s website.
- You can:
- Add a description of the insurance plan.
- Provide a link label (e.g., “View Plan” or “Buy Insurance”).
- Add the URL of the affiliate insurance site.
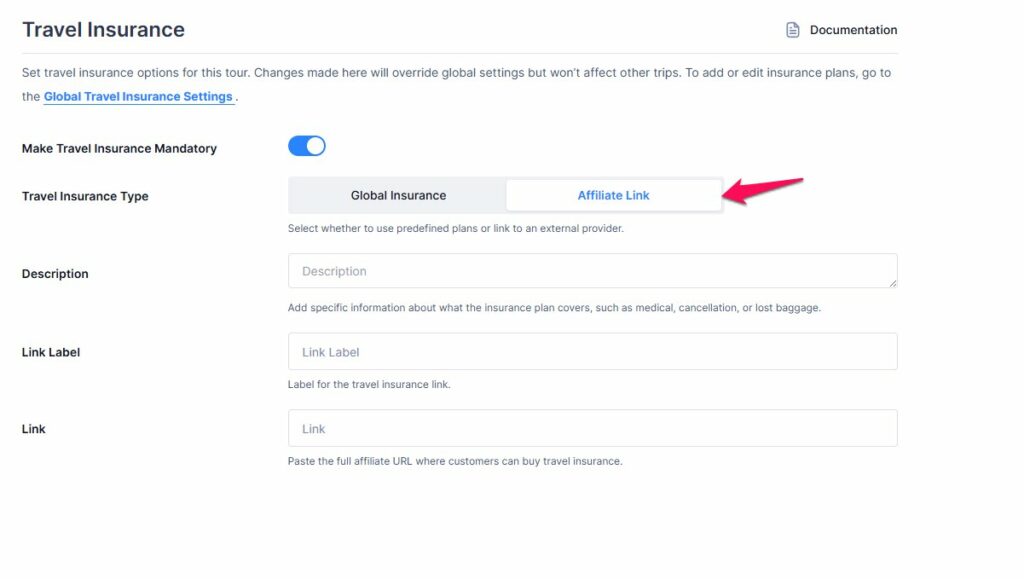
Note: This is useful if you’re partnered with an external insurance provider or selling third-party plans.
- Save Changes
- Once all details are configured, click Update/Publish to apply the insurance settings to the tour.
- Once all details are configured, click Update/Publish to apply the insurance settings to the tour.
📧 If you face any issues or have questions, please reach out to our support team or initiate the chat located on the right.