Your site receives a free Tripcart subdomain by default. You can enhance branding by adding your own domain.
The Custom Domain feature in Tripcart lets you personalize your website’s domain, enabling a branded URL like yourdomain.com instead of the default your-subdomain.tripcart.site.
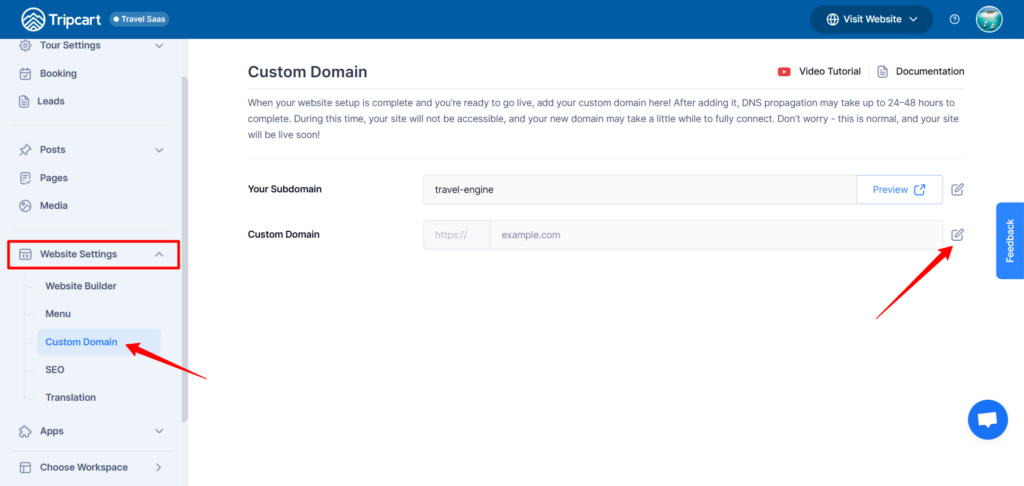
Step 1: Access Custom Domain Settings #
- Log in to your Tripcart account and navigate to your Dashboard.
- Go to Website Settings > Custom Domain.
- Click the Edit button beside the Custom Domain field to access the domain setup.
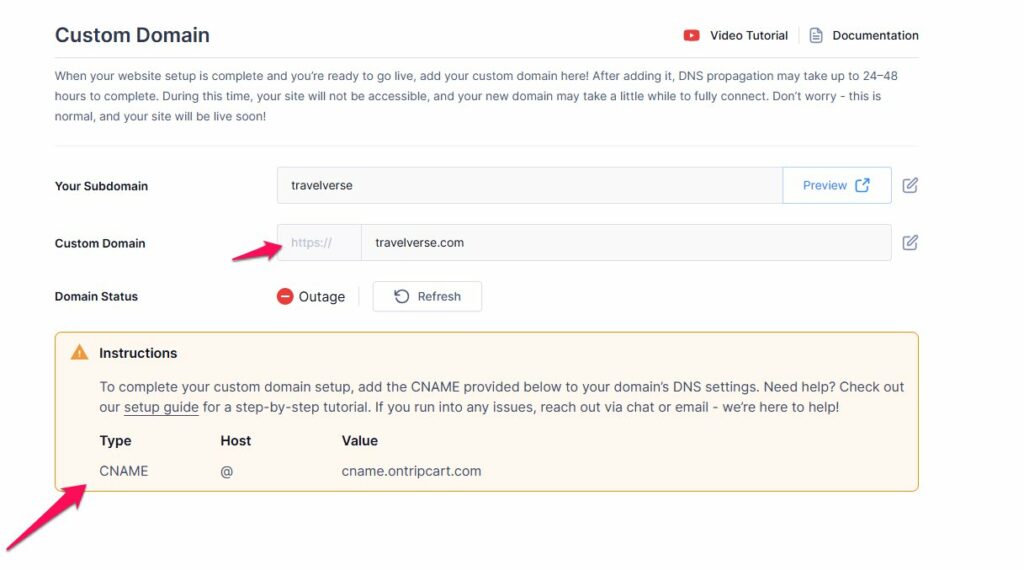
Step 2: Add Your Custom Domain URL in TripCart #
- In the Custom Domain field, enter your complete custom domain URL, including https://. Example: https://yourdomain.com
- Click the Tick icon to confirm and proceed with the setup.
Step 3: Create a Cloudflare account #
To improve your website’s performance, speed, and security, it is highly recommended to configure your site with Cloudflare. Cloudflare is a free and powerful tool that manages your website’s DNS and protects your site from malicious traffic while optimizing content delivery.
Create an account from this link here: https://www.cloudflare.com/
Step 4: Update Nameservers at Your Domain Registrar #
After creating your Cloudflare account, the next step is to connect your domain to Cloudflare by updating the nameservers provided by Cloudflare at your domain registrar.
Steps to Add Your Domain in Cloudflare #
- Login to your Cloudflare dashboard.
- Click the Add Site button.
- Select Connect a domain from the dropdown menu.
- Enter your domain URL (e.g., www.example.com).
- Cloudflare will automatically import your existing DNS records. Review them and click Continue.
- Select the Free Plan and follow the prompts to complete the setup.
Find Your Cloudflare Nameservers #
- Copy these nameservers; you will need them in the next step.
- You will see two Cloudflare nameservers listed (e.g.,
ns1.cloudflare.comandns2.cloudflare.com).
Update Nameservers at Your Domain Registrar #
- Login to your domain registrar account (the platform where you purchased your domain).
- Navigate to your domain management or DNS settings.
- Locate the fields to update Primary Nameserver and Secondary Nameserver.
- Paste the nameservers provided by Cloudflare.
- Save the changes.
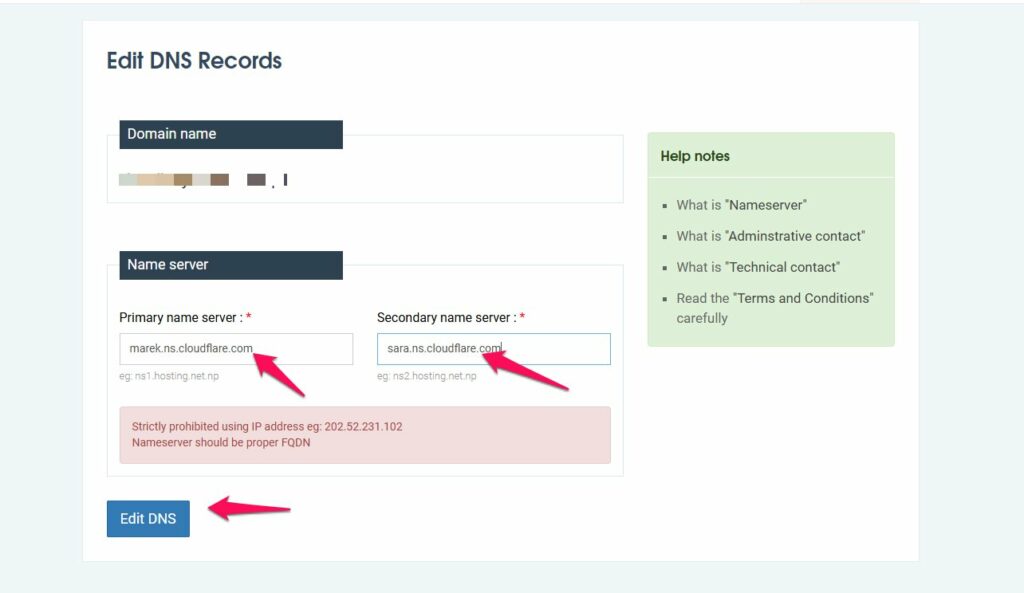
Note: The interface may vary depending on your domain registrar. Look for “Nameservers” or “DNS settings.”
Step 5: Add CNAME Record for Tripcart in Cloudflare #
After pointing your domain to Cloudflare, you need to add a CNAME record provided by the Tripcart dashboard to properly connect your website.
- Go to the DNS section and select Records.
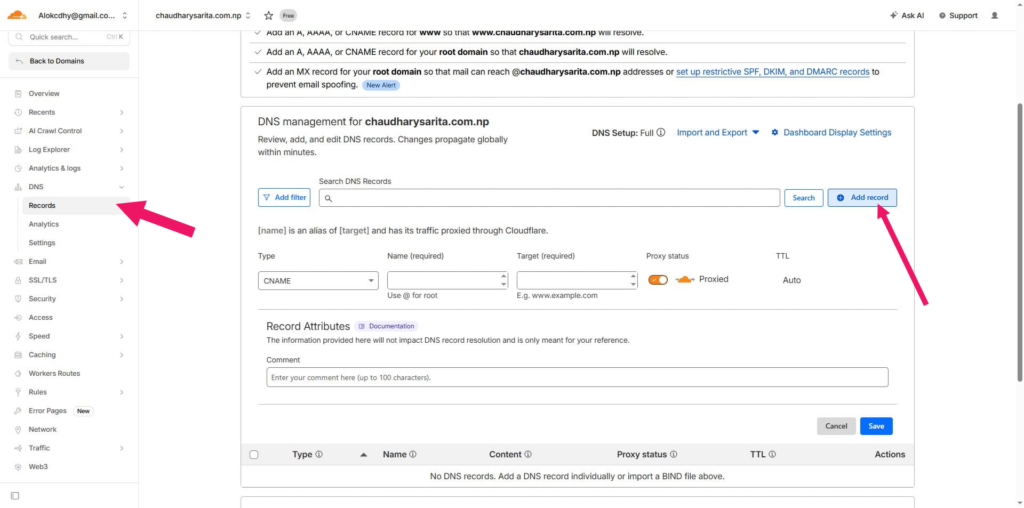
2. Configure the CNAME settings as follows:
- Type: Select CNAME
- Name: Use “@” to denote your root domain
- Target: Enter cname.ontripcart.com
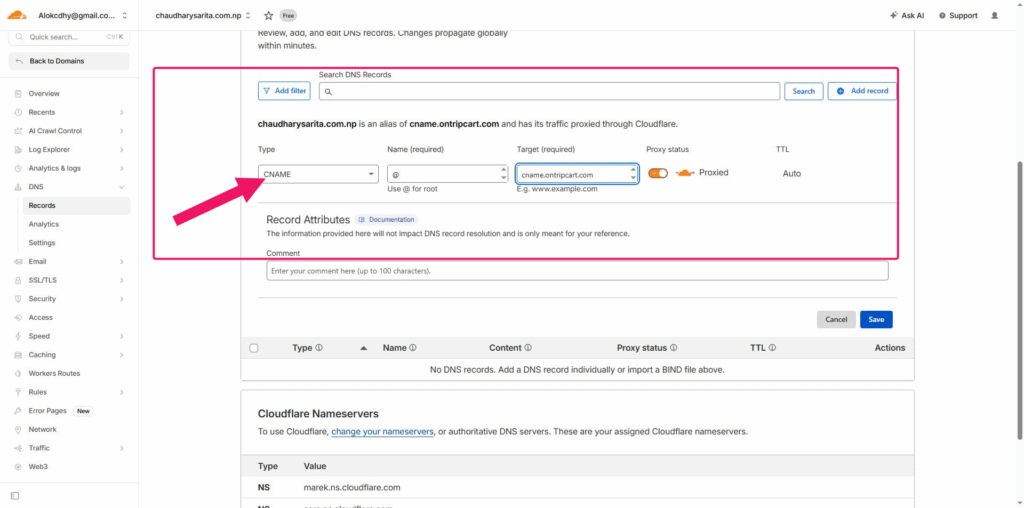
- Click Save to apply the settings.
Step 4: Verify Your Domain #
After configuring your DNS, Tripcart will automatically start the verification process. This may take a few hours to complete. Once the domain verification process is completed, you will receive an email with your domain status.
- If verification fails after a few hours, double-check the DNS settings in your Cloudflare account for accuracy.
- For continued issues, reach out to the Tripcart Support Team for assistance.
📧 If you face any issues or have questions, please reach out to our support team or initiate the chat located on the right.