Reusable Blocks is a tool that allows you to add blocks that can be reused on any page, post, or trip. These blocks can include a group of elements like text, lists, images, and many more. It helps simplify your workflow when you need to use the same content across multiple places.
There is also an option to Sync Content, meaning if you update the content of a reusable block, the changes will automatically apply everywhere that block has been used on your site.
Follow the steps below to enable Reusable Blocks:
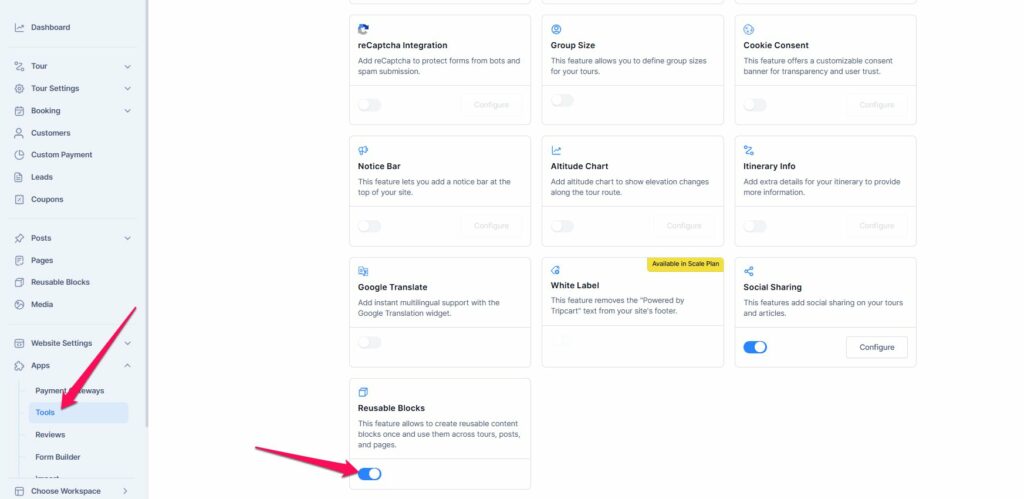
Step 1: Enable the Reusable Blocks Tool #
- Log in to the Tripcart Dashboard.
- In the left sidebar, navigate to Apps > Tools.
- Locate the Reusable Block section.
- Toggle the switch to enable Reusable Blocks.
Step 2: Add the Reusable Block #
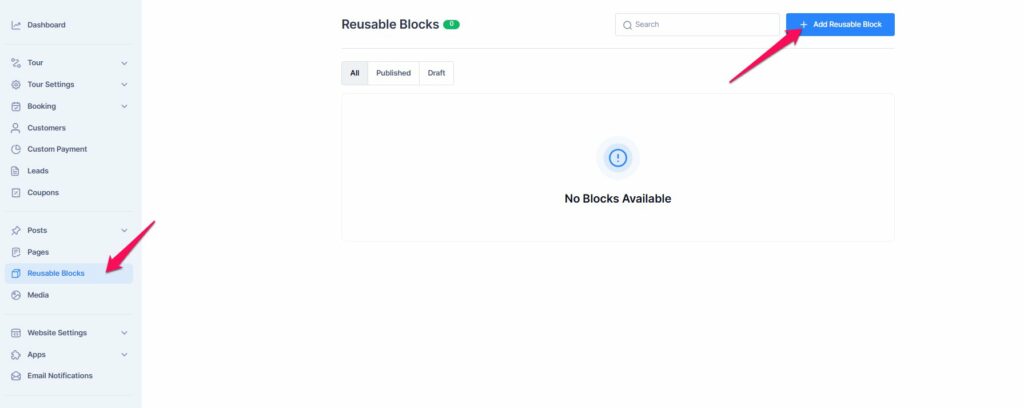
You can add the Reusable block via Dashboard > Reusable Blocks. You can add the block here. Please follow the steps below:
- Click on the Add Reusable Block here.
- Add the title of the Block.
- Click on the “+” icon to add a block.
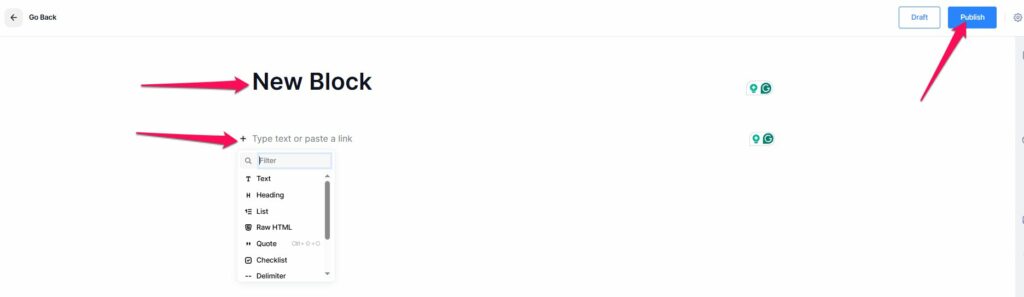
- Repeat the step to add multiple blocks like Text, Quote, Image, and more.
- After adding the blocks and their content, click the “Publish” button.
- To sync the content across all places where the block is used, enable the “Sync Content” toggle from the Settings. By default, this setting is enabled. Any edits made to the block will automatically update everywhere it’s used.

- If you want to edit the content of a block separately in a specific section, disable the Sync Content toggle.
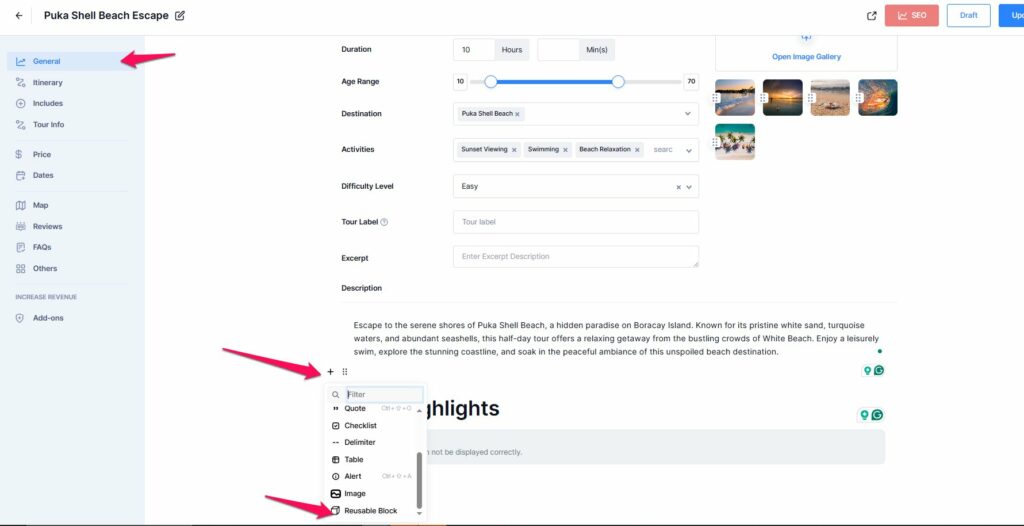
Step 3: Add the Reusable Blocks in Pages/Posts #
Please follow the steps below to add a Reusable Blocks to a Page or Post:
- Go to Dashboard > Pages/Posts > Add New.
- Click the “+” icon to open the block inserter.
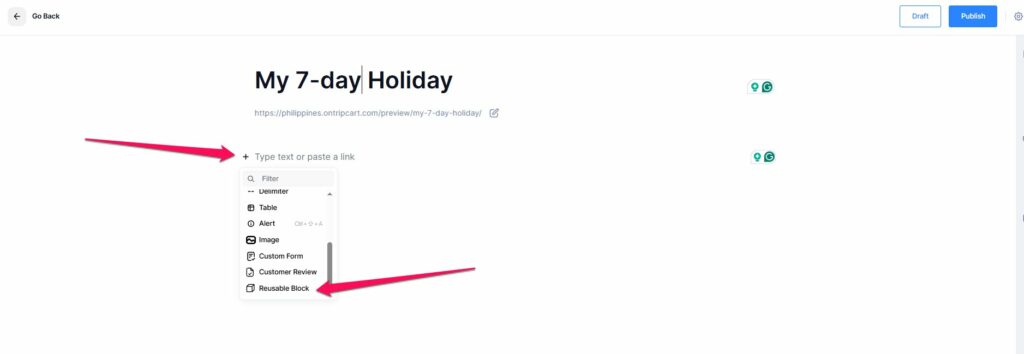
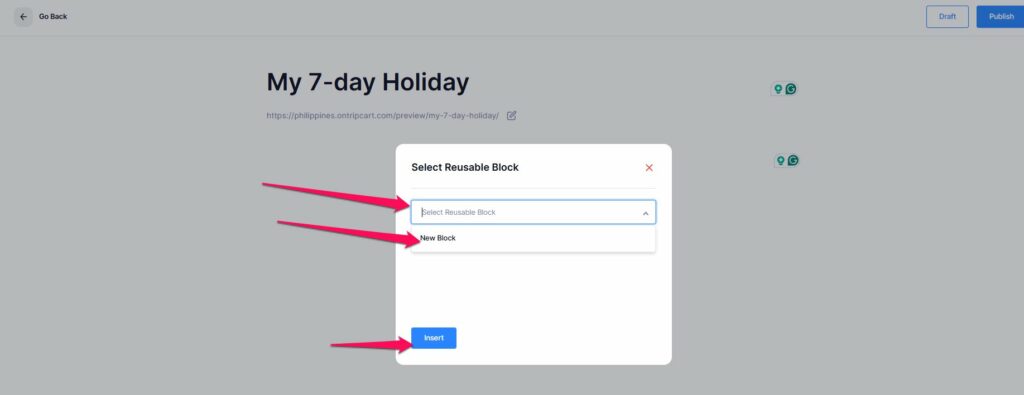
- Scroll to or search for Reusable Blocks, then select the block name you previously created.
- Click “Insert” to add the block to your content.
Once the block is added, you can either edit its content or leave it as is. If Sync Content is enabled, any changes you make will automatically update across all pages, posts, or trips where the block is used.
Step 4: Tour Section to add Reusable Blocks #
Similarly, you can add the Reusable Block to different sections of a trip. It can be inserted in the Description section, Other Sections, and the Trip Info Custom Tab.