Tripcart allows you to customize the SEO meta titles and descriptions for default pages to improve search engine rankings and optimize visibility. Follow the steps below to configure these settings.
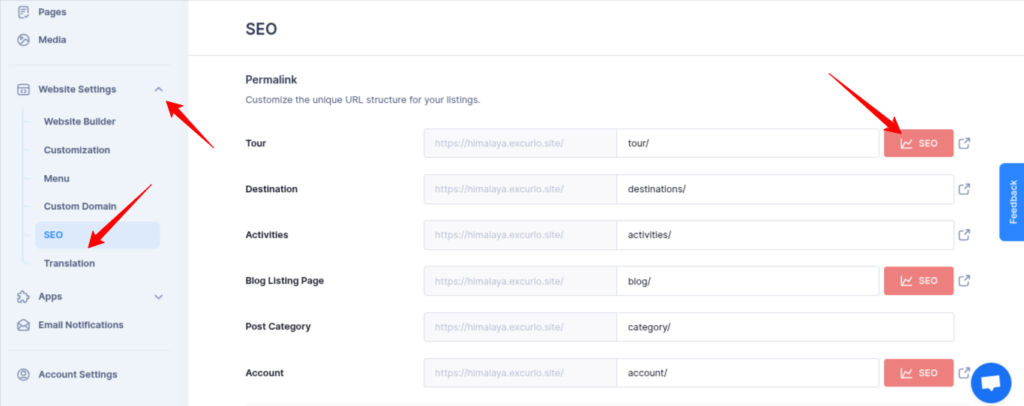
Accessing SEO Settings #
- Log in to the Tripcart Dashboard.
- In the left sidebar, navigate to Website Settings > SEO.
- The SEO Settings page will open, where you can:
- Click on the SEO Button to open the SEO settings popup.
- Modify meta titles and descriptions for default pages.
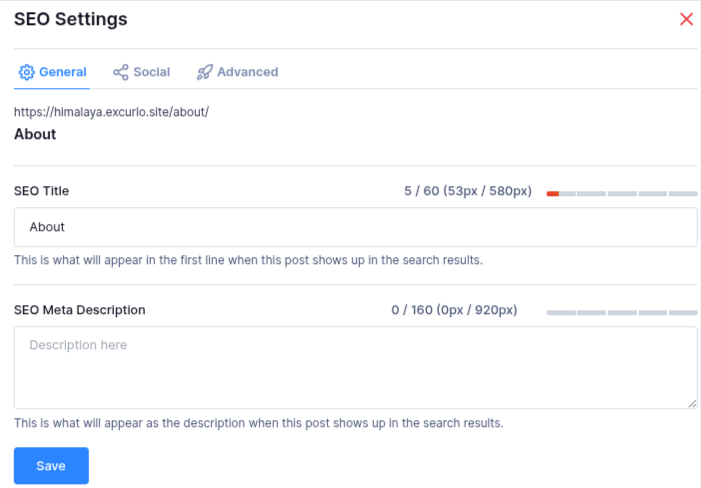
SEO Settings Window Overview #
Once you click on the SEO button, the SEO settings window will pop up. This window consists of three tabs: General, Social, and Advanced.
General Tab #
This tab allows you to set up basic SEO information for your website.
- SEO Title: Enter a concise and descriptive title for your site. This title appears in search engine results and browser tabs.
- SEO Meta Description:Provide a brief summary of your website’s content. The meta description will show up below the title in search engine results and helps search engines understand the context of your page.
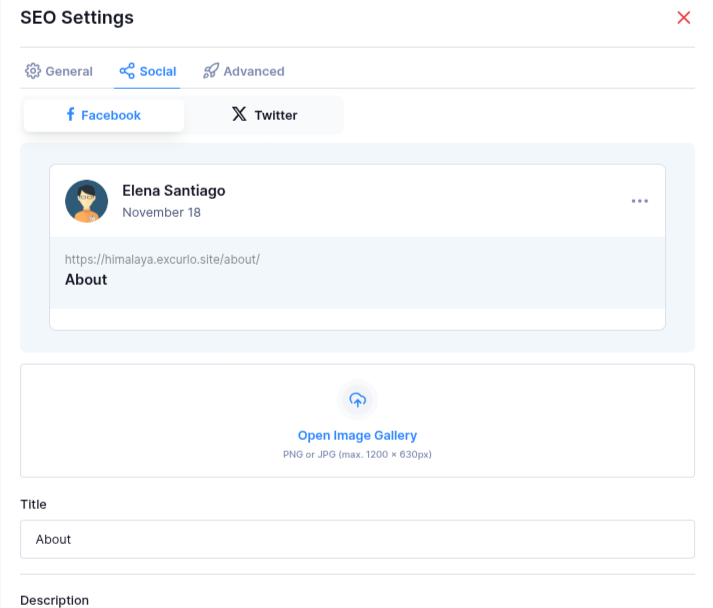
Social Tab #
This tab helps you manage how your website will appear when shared on social media platforms like Facebook and Twitter.
Facebook & Twitter Settings: Customize how your content appears on social media.
- Image: Upload a preview image.
- Title: Set a custom title for social media posts.
- Description: Add a description for social media platforms.
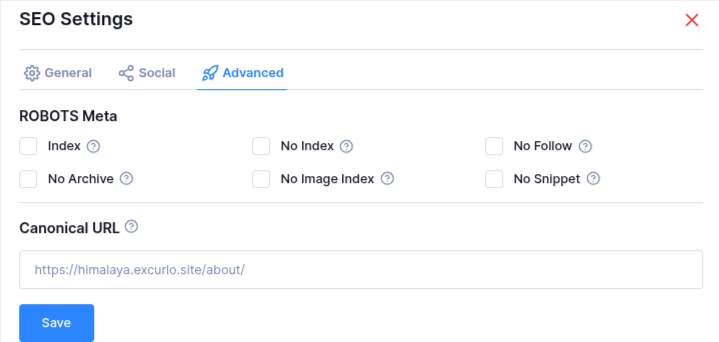
Advanced Tab #
In this tab, you can manage more advanced SEO settings, including how search engines index your page and the canonical URL.
Robot Meta Settings: These settings allow you to control how search engines crawl and index your pages. You can enable or disable the following options:
- Index: Allows search engines to index the page, making it visible in search results.
- No Index: Prevents search engines from indexing the page. This is useful for pages that you don’t want to appear in search results (e.g., thank-you pages, login pages).
- No Follow: Tells search engines not to follow any links on this page. This is useful if you don’t want to pass link authority to the links on this page.
- No Archive: Prevents search engines from storing a cached copy of the page.
- No Image Index: Instructs search engines not to index images on the page.
- No Snippet: Prevents search engines from showing a preview of the page’s content (like a snippet) in search results.
Canonical URL:
- Add the canonical URL to prevent duplicate content issues. This tells search engines which version of a page to consider as the main one, especially if you have multiple pages with similar content.
📧 If you face any issues or have questions, please reach out to our support team or initiate the chat located on the right.