Introduction #
Google Analytics 4 (GA4) helps you understand how visitors interact with your Tripcart site. Once connected, you can track tour views, checkout activity, completed bookings, revenue, and overall marketing performance.
Tripcart automatically sends events to GA4, so you can view all the important user activity and insights directly in your Google Analytics dashboard.
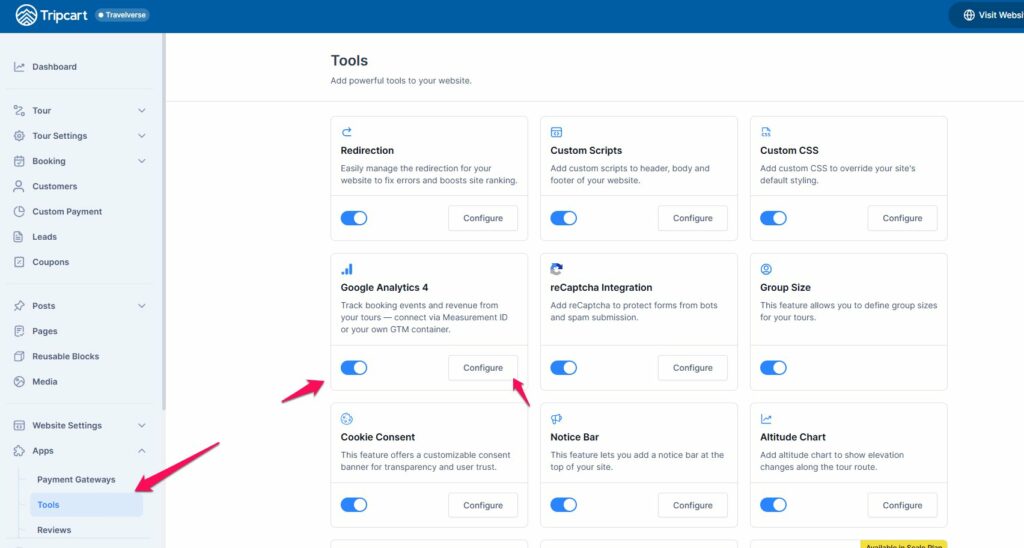
You can configure settings via Dashboard > Apps > Tools > Google Analytics 4. There are two ways to configure Google Analytics.
When to Use GA4 and When to Use GTM
If you only want to track standard events such as View Item, Begin Checkout, and Purchase, then Google Analytics 4 (GA4) is sufficient. Tripcart already sends these events automatically, allowing you to view the data directly in your GA4 dashboard.
However, if you want to track custom events beyond the events that Tripcart provides by default, then you should use Google Tag Manager (GTM).
Method 1: Direct GA4 Integration #
Step1: Create Your Google Analytics Account #
If you already have GA4 set up, you can skip to Step 2.
- Go to analytics.google.com and sign in with your Google account
- Click Start measuring (for new users) or go to Admin (gear icon)
- Under Property, click Create property
- Enter:
- Property name (e.g., “My Tour Store”)
- Time zone
- Currency
- Select your business goals (e.g., Generate leads, User engagement)
- Click Create and accept the terms
Connect Your Website (Data Stream) #
- Choose Web as the platform
- Enter your website URL
- Name the stream (e.g., “Main Store”)
- Click Create stream
You will now see a Measurement ID (G-XXXXXXXXXX).
📌 NOTE: Keep this tab open; you will need this ID in both GTM and Tripcart setups.
Step 2: Turn on the GA4 integration in Tripcart #
- Sign in to your Tripcart admin dashboard.
- Click Tools in the left sidebar.
- Find the Google Analytics 4 card and enable the toggle.
- Click the Configure button on the same card.
- Select Google Analytics 4 in Connection Method
- Paste your Google Analytics measurement ID (
G-XXXXXXXXXX).
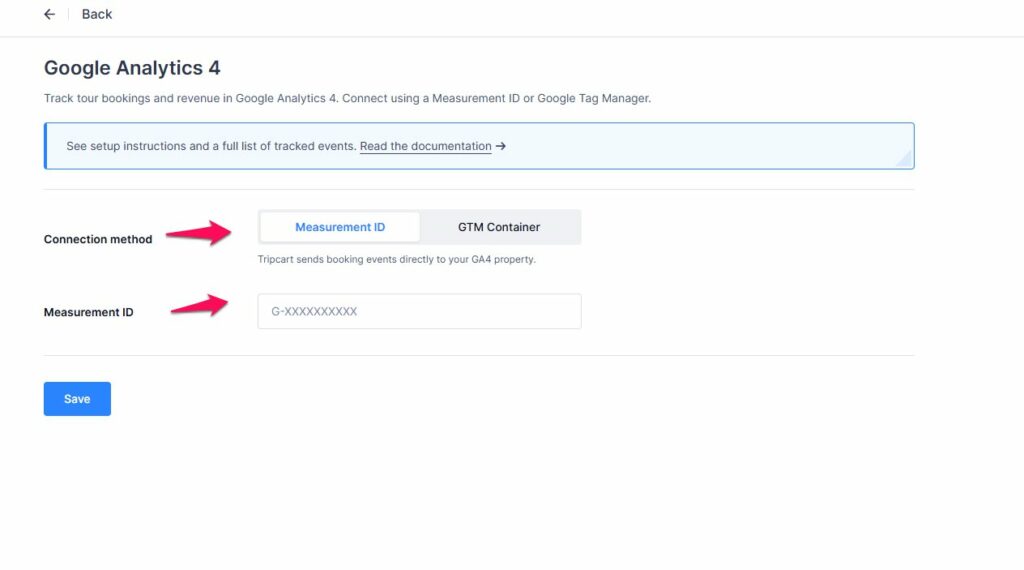
GA4 will begin collecting Tripcart events automatically. No additional tag configuration is required for standard page views, tour views, checkout activity, purchases, and other supported events.
Verify the connection #
- Open your website in a new browser tab.
- In GA4, go to Admin → Data Streams → [your stream] → View in Realtime or open the Realtime report.
- You should see your active session and page_view events within a few seconds.
Method 2: Configure GA4 through Google Tag Manager (GTM) #
Step 1: Create a GTM account and container #
If you already have a GTM account and Web container, skip to Step 2.
- Go to tagmanager.google.com and sign in.
- Click Create Account.
- Enter an Account Name (usually your business name).
- Under Container, enter your website domain and select Web.
- Click Create and accept the terms.
Step 2: Import the Tripcart GTM container template #
You can download GTM container JSON file that includes the events and triggers supported by the platform here:
- In GTM, click Admin.
- Under the container column, click Import Container.
- Download the JSON file and upload it.
- Choose Add to Default workspace after completing the import.
Step 3: Connect GTM to your GA4 property #
- Locate the imported GA4 Configuration tag (or similarly named GA4 tag) in the workspace.
- Open the tag and paste your GA4 Measurement ID (G-XXXXXXXXXX) into the Measurement ID field.
- Save the tag.
Step 4: Test with Tag Assistant #
- Click Preview in GTM.
- Enter your website URL and click Connect.
- Browse a few pages, open a tour, and (optionally) go through checkout using a test booking flow.
- In the Tag Assistant window, confirm that the imported GA4 tags are firing on the expected pages/events.
- After that, click on the Submit button on the GTM dashboard.
Step 5: Add the GTM Container ID to Tripcart #
- In GTM, copy the Container ID (e.g., GTM-ABC1234).
- Click Tools in the left sidebar.
- Find the Google Analytics 4 card and enable the toggle
- Click the Configure button on the same card.
- Select the GTM Container Tab.
- Paste your GTM container ID here.

Once saved, Tripcart will load the GTM container on your site, and GTM will handle the GA4 tags and any additional marketing tags you configure.
Marketing Attribution #
Tripcart automatically captures campaign information from UTM parameters, including:
- utm_source
- utm_medium
- utm_campaign
- utm_term
- utm_content
This allows you to identify which marketing campaigns, advertisements, social posts, or emails generated bookings and revenue.
Tripcart also stores the original landing page for every booking.
You can view it here:
Dashboard → Bookings → All Bookings → Select Booking → Booking Source Section
📌 NOTE: This data is also sent to Google Analytics so you can match bookings with ad performance and campaign performance.

This section shows:
- Full landing URL with UTM parameters
📧 If you face any issues or have questions, please reach out to our support team or initiate the chat located on the right.