Skip to main content Skip to footer
TripCart
  • Support
  • Login
Start Free Trial
TripCart
  • Tour Operators
  • Rental Companies
  • Boat Tours
  • Attractions
  • Trains
  • Ziplines
  • Farms
  • Customer Stories
Start Free TrialBook a Demo

Create and Manage Tours

  • How to Add Group Discount
  • How to Create a Multi-Day Tour
  • How to Create a Single-Day or Activity Tour?
  • How to Create Tour Packages for Multi-Day and Single-Day/Activities
  • How to add Destinations for Tour?
  • How to Add Activities for Tours
  • What are Add-ons, and How to Use Them?
  • How to Add Accommodations to Tours
  • How to setup Customer’s Account Page
  • How to Enable and Manage Coupon Codes for Tours
  • How to View and Manage Tour Bookings
  • How to Display Reviews for Your Tours
  • How to Set and Manage Difficulty Levels for Tours
  • How to Add and Manage Tour Information
  • How to Import Tours

Tour Settings

  • How to configure Display Preference
  • How to add Meal Options
  • How to edit Traveler Login Page details
  • How to Enable the Deposit Payment Feature
  • How to enable Discount on Full Payment
  • How to Add Tour Highlight
  • How to Block Dates For Tours
  • How to Add WhatsApp Number To Your Tour Detail Page
  • How to set Tour Inquiry Lead Form
  • How to Define Pricing Categories for Tours
  • How to Configure the Currency Settings
  • How to Add Custom Filters

Website Settings

  • How to Customize Colors and Fonts on Your Website?
  • How to Enable the Scroll-to-Top Button
  • How to Add Sections to the Homepage
  • How to Clear Website Cache
  • How to Translate Your Website into a Local Language
  • How to Create and Manage Menus
  • How to Customize the Website Footer?
  • How to Add Meta Titles and Descriptions for the Homepage?
  • How to Configure the Website Header?
  • How to connect your domain

Payment Gateways

  • How to Manage Tax Settings in Tripcart
  • How to configure Getnet Payment Gateway
  • How to configure the Midtrans Payment Gateway
  • How to configure the Revolut Payment Gateway?
  • How to configure the Global IME Payment Gateway
  • How to configure the Xendit Payment Gateway
  • How to configure the RazorPay Payment Gateway
  • How to Add a Custom Booking Link for Your Tours
  • How to Set Up a Payment Reminder for Due Amounts
  • How to Create Custom Payment Links for Bookings or Invoice
  • How to Enable and Use the Booking Fee Feature
  • How to Configure HBL Payment Gateway
  • How to Configure Authorize.net Payment Gateway
  • How to Configure Payment Settings for Checkout
  • How to Configure Stripe Payment Gateway
  • How to Configure PayPal Payment Gateway
  • How to Configure Cybersource Payment Gateway
  • How to Configure Nabil Bank Payment Gateway
  • Book Now and Pay later

Email Notifications

  • How to Set Up Email Notifications for Customers
  • How to Configure SMTP for Your Website
  • How to Customize the Header and Footer for Emails

Pages and Posts

  • How to Create Pages?
  • How to Publish Blog Posts on Your Site?
  • How to Add Categories and Assign Them to Posts?
  • How to add FAQs Block using Text Editor?

Apps

  • Tools
  • Reviews
  • Form Builder

Account Settings

  • How to Add or Remove Team Members
  • How to Update Your Company Information
  • How to Update Your Profile Information

FAQs

  • How to Check File Storage Usage and Email Quotas?
  • What is a Workspace, and How to Create One?
  • How to Update the Website Footer Copyright

SEO Settings

  • How to Add SEO Meta Titles and Descriptions to Default Pages
  • How to Analyze the SEO Score for Tours, Posts, and Pages
  • How to Enable or Disable Breadcrumbs on Your Website
  • How to Update the URL Structure for Default Pages

Tools

  • How to Integrate Google Translate
  • How to create API Keys
  • How to add Travel Insurance
  • How to create Webhooks
  • How to configure the Checkout Form Editor?
  • How to use the Reusable Blocks?
  • How to configure the White Label
  • How to Create and Embed Forms on Your Website
  • How to Bulk Import Redirections Easily
  • How to add a Notice Bar
  • How to add the Altitude Chart in Tour Itinerary
  • How to add Itinerary Info
  • How to Configure a Cookie Consent Notice for Your Website
  • How to Integrate reCAPTCHA for Bot Protection
  • How to Add Custom CSS to Your Website
  • How to Add Scripts (e.g., Google Analytics) to Your Website
  • How to Set Up Redirection for Your Site

Import

  • How to import WP Travel Engine trips
  • How to import WordPress Posts and Pages

Payments and Billing

  • How to upgrade or downgrade your plan
  • How to download your invoice
  • How to cancel your plan
View Categories
  • Home
  • Documentation
  • Tour Settings
  • How to configure Display Preference

How to configure Display Preference

1 min read

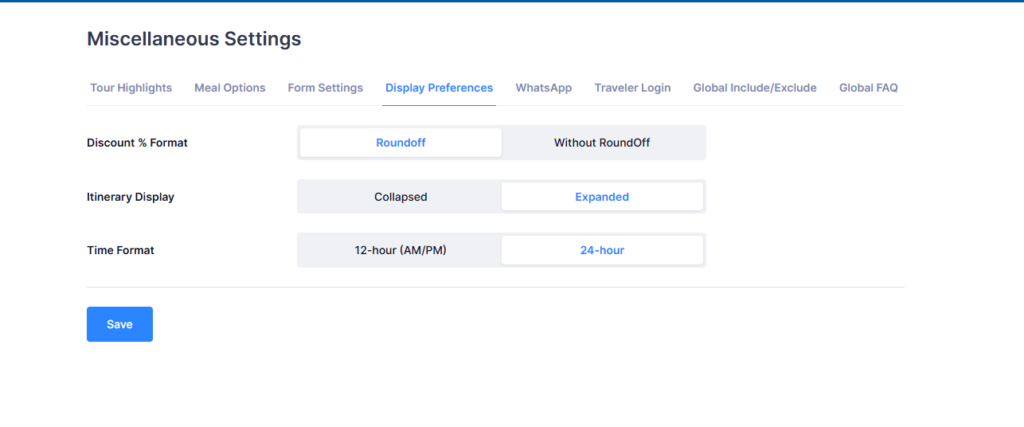
Display Preferences controls how certain information is visually presented to travelers on your booking pages. These settings are global, meaning they apply across all tours unless overridden at the individual tour level.

You can find the Display Preference settings via Dashboard → Tour Settings → Miscellaneous Settings → Display Preference.

Below are the lists of settings available in Display Preferences:
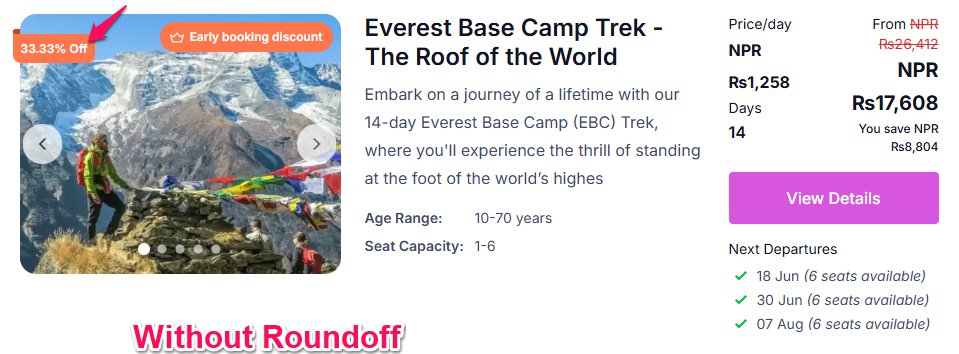
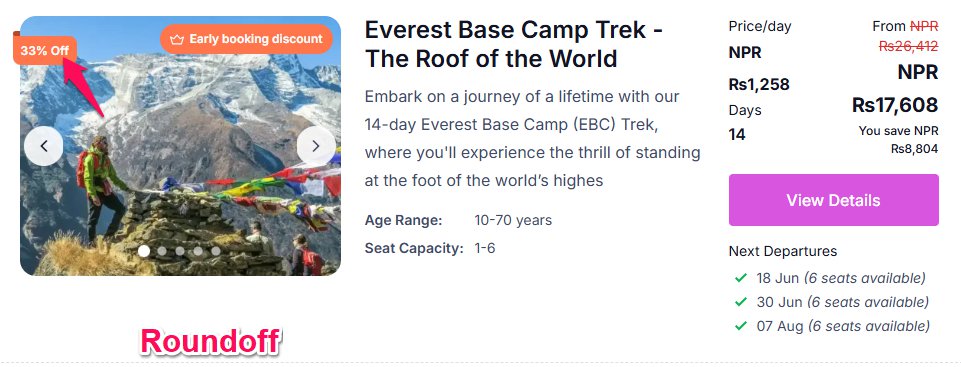
Discount % Format #

Controls how discount percentages are shown to travelers.

  • Roundoff: Displays the discount as a whole number (e.g., 15%). Best for cleaner, simpler presentation.
  • Without RoundOff: Displays the exact discount value with decimals (e.g., 14.67%). Useful when pricing precision matters.
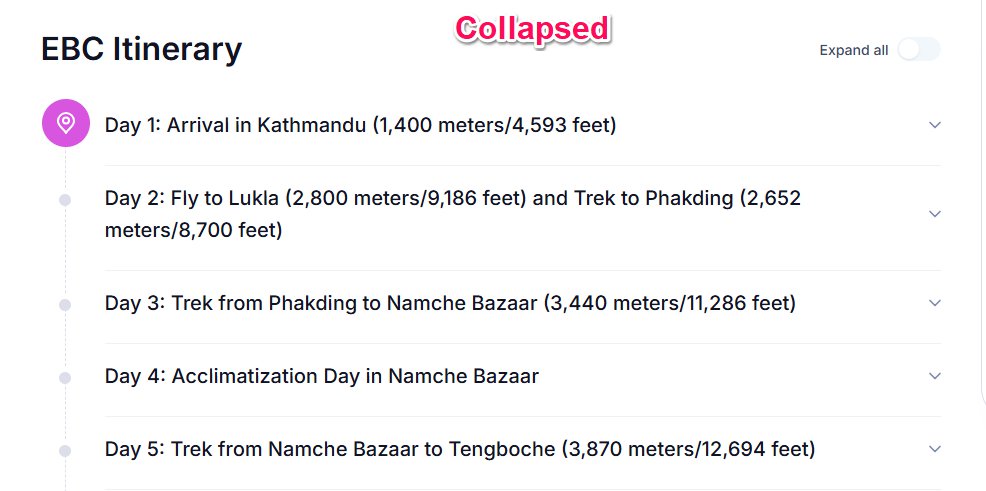
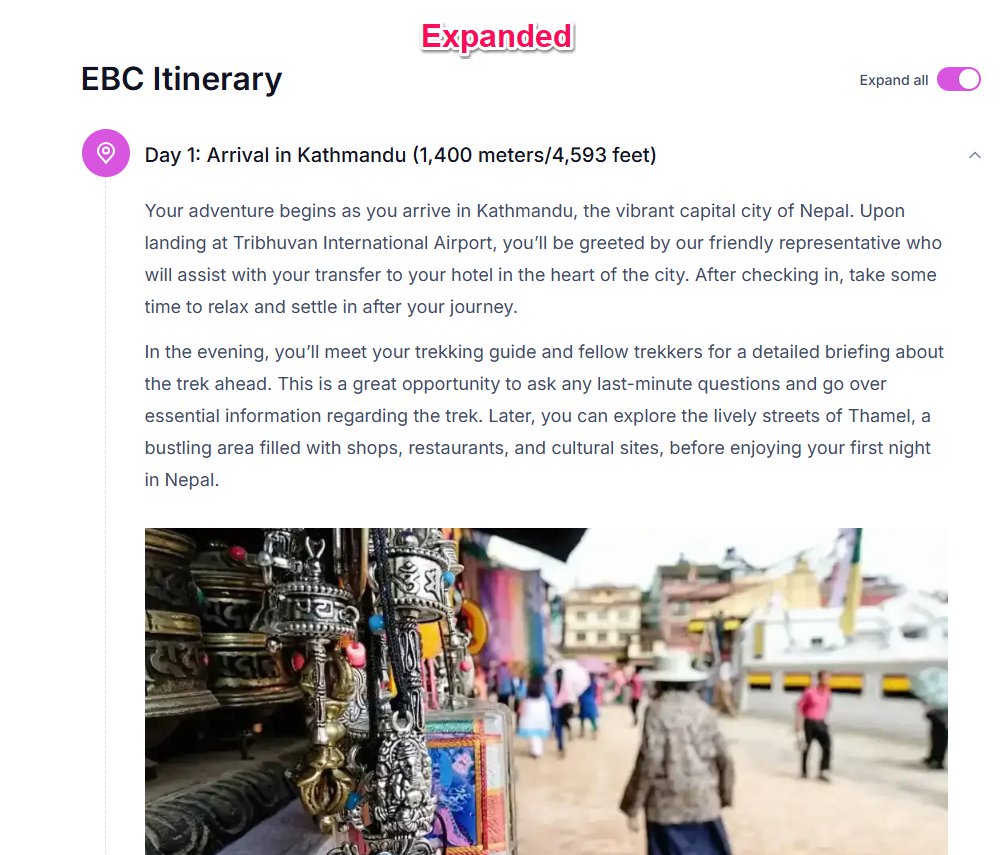
Itinerary Display #

Controls how the tour itinerary appears by default on the tour detail page.

  • Collapsed: Itinerary sections are folded by default. Travelers can expand them manually. Keeps the page compact, especially useful for longer itineraries.
  • Expanded: All itinerary sections are visible immediately when the page loads. Better for shorter itineraries or when you want travelers to see the full day-by-day breakdown upfront.
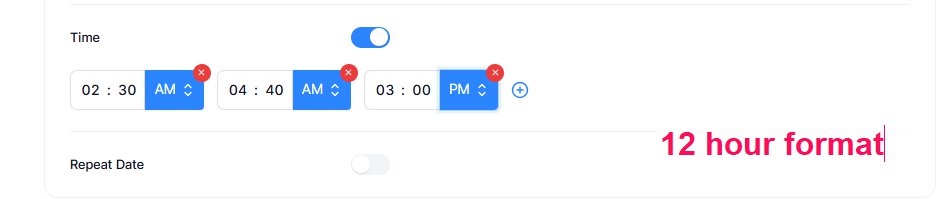
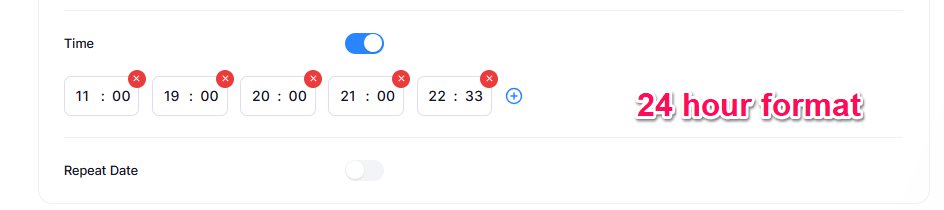
Time Format #

Controls how times are displayed across tour schedules and departure times.

  • 12-hour (AM/PM) : Displays times in the standard 12-hour clock format (e.g., 2:30 PM). Suitable for markets where AM/PM notation is more familiar. You can add the time in this format for a single-activity tour.
  • 24-hour: Displays times in 24-hour format (e.g., 14:30). Preferred in many international and professional travel contexts.

Once you’ve configured your preferred options, click Save to apply the changes.

📧 If you face any issues or have questions, please reach out to our support team or initiate the chat located on the right.


Updated on June 8, 2026
How to Add Custom FiltersHow to add Meal Options
Table of Contents
  • Discount % Format
  • Itinerary Display
    • Time Format
© 2025 Tripcart. All rights reserved.